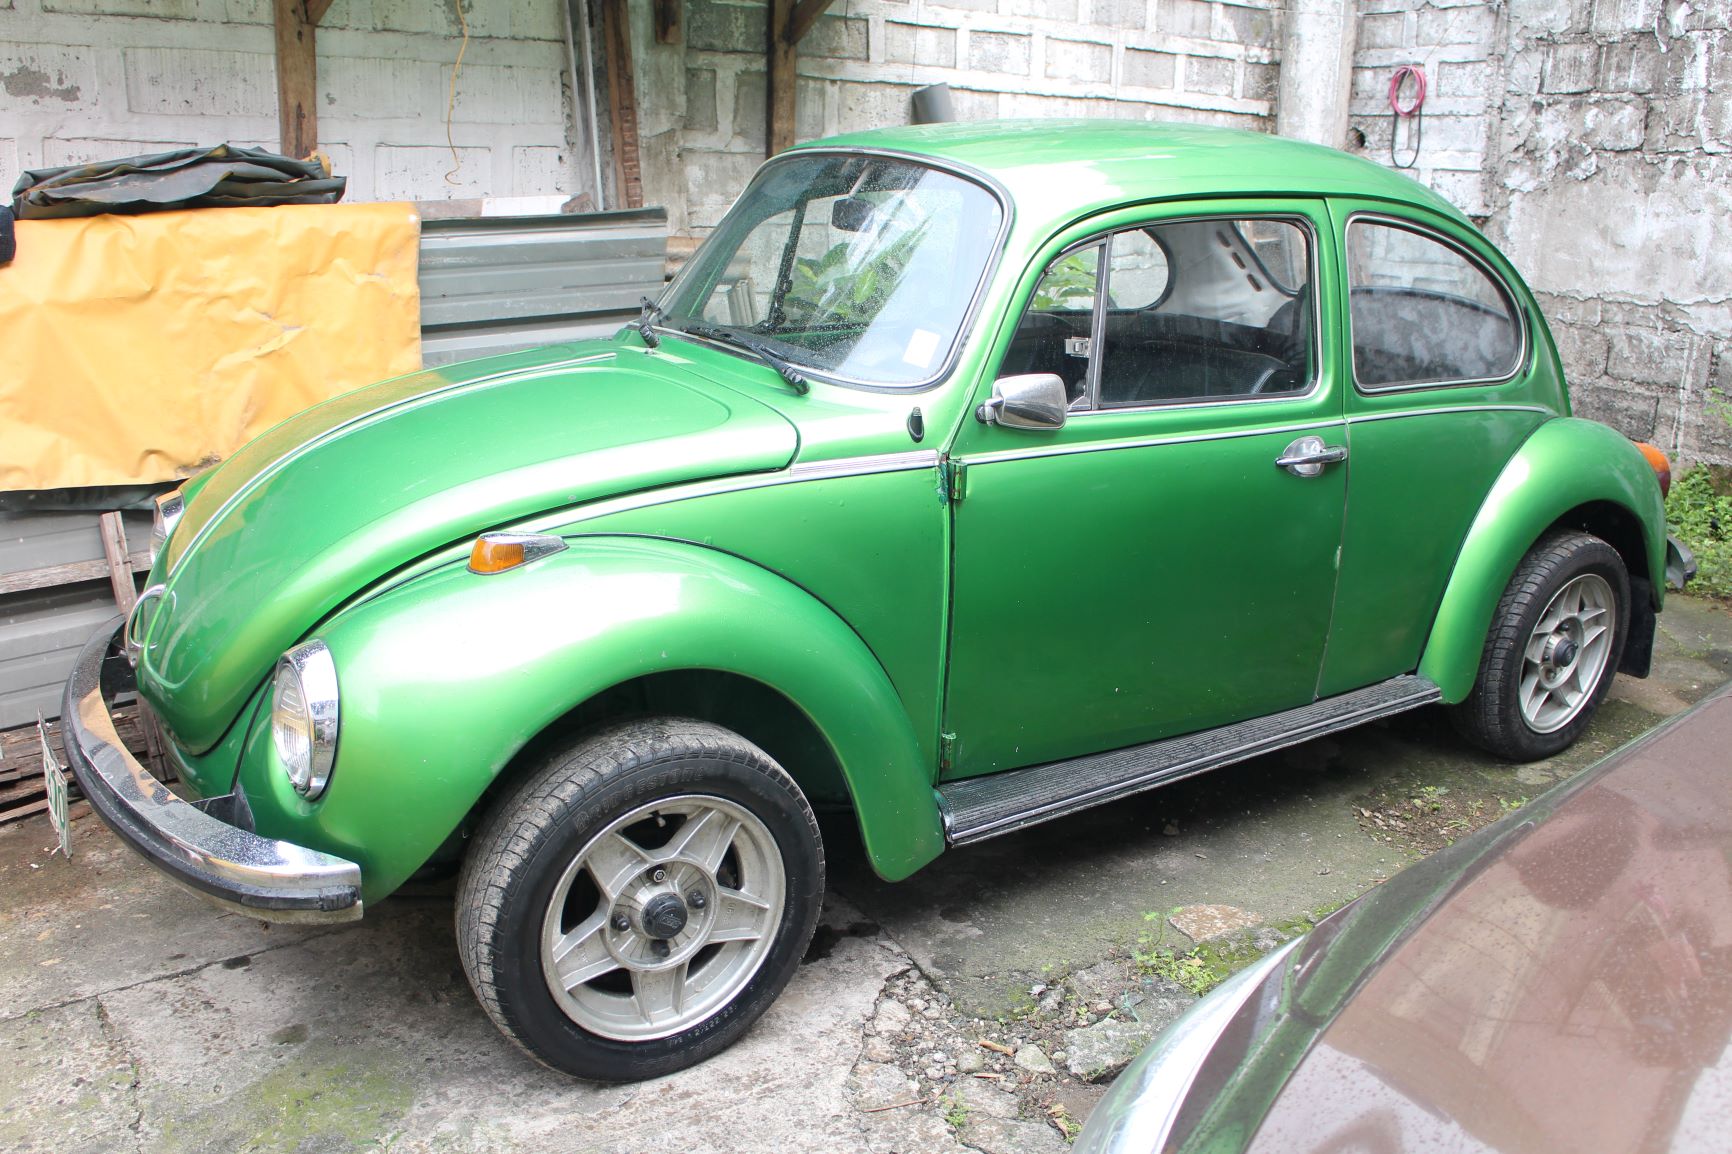
In our previous report, I narrated how I injured the middle finger of my right hand while I was trying to restart our 1974 Volkswagen Super Beetle 1303 S project car that stalled along a dark road on November 22, 2020. The doctor advised me to rest and NOT work on anything that would aggravate the swelling of my middle finger. However, I’m the type who just can’t sit still, and I found myself working around the house and banging my injured middle finger quite often that the swelling lingered on for more than two weeks. I suddenly realized how the middle finger, which is the longest finger in our hands, is always the first finger to come in contact with anything that we attempt to touch. With an injury such as the one on mine, it’s almost always a painful experience just to reach for something.
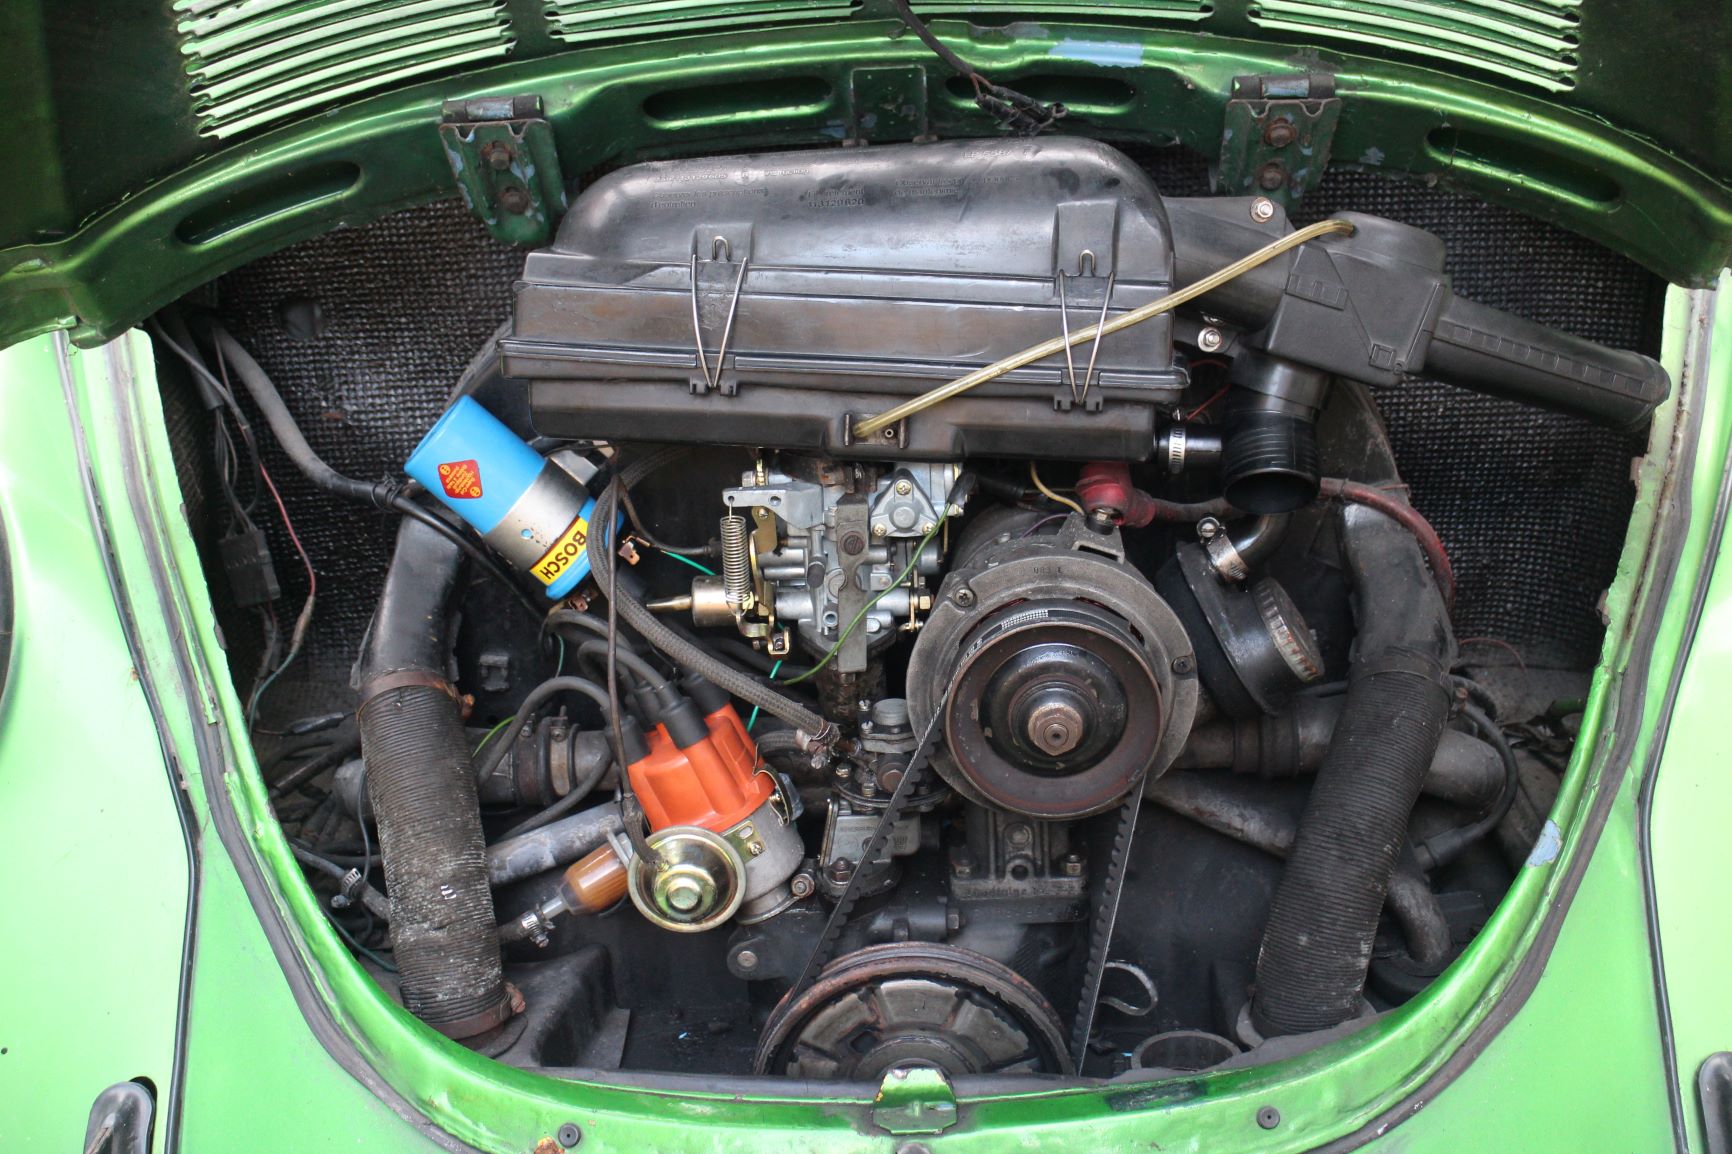
While waiting for my finger to heal, I looked at the Super Beetle’s engine bay and listed down the repairs I have to do to make it run again. I found a German-made Continental Contitech AVX 10 x 905 fan belt in the front luggage compartment but since I’m not sure of how old it is, I decided NOT to use it and just keep it as a spare belt. I looked at the ignition coil, which is an old Compu Fire unit, that may probably be more than a decade old and may be the cause of the engine stalling problem. On December 11, almost three weeks after my middle finger injury, I went to F.C. Lim Auto Supply along Araneta Avenue, which specializes in Volkswagen parts, and bought a new Canadian-made Reyflex 9.5 x 905 heavy-duty fan belt for P150.00 and a new Bosch Blue ignition coil for P6,000.00 so I could start the repairs.

Replacing the Fan Belt
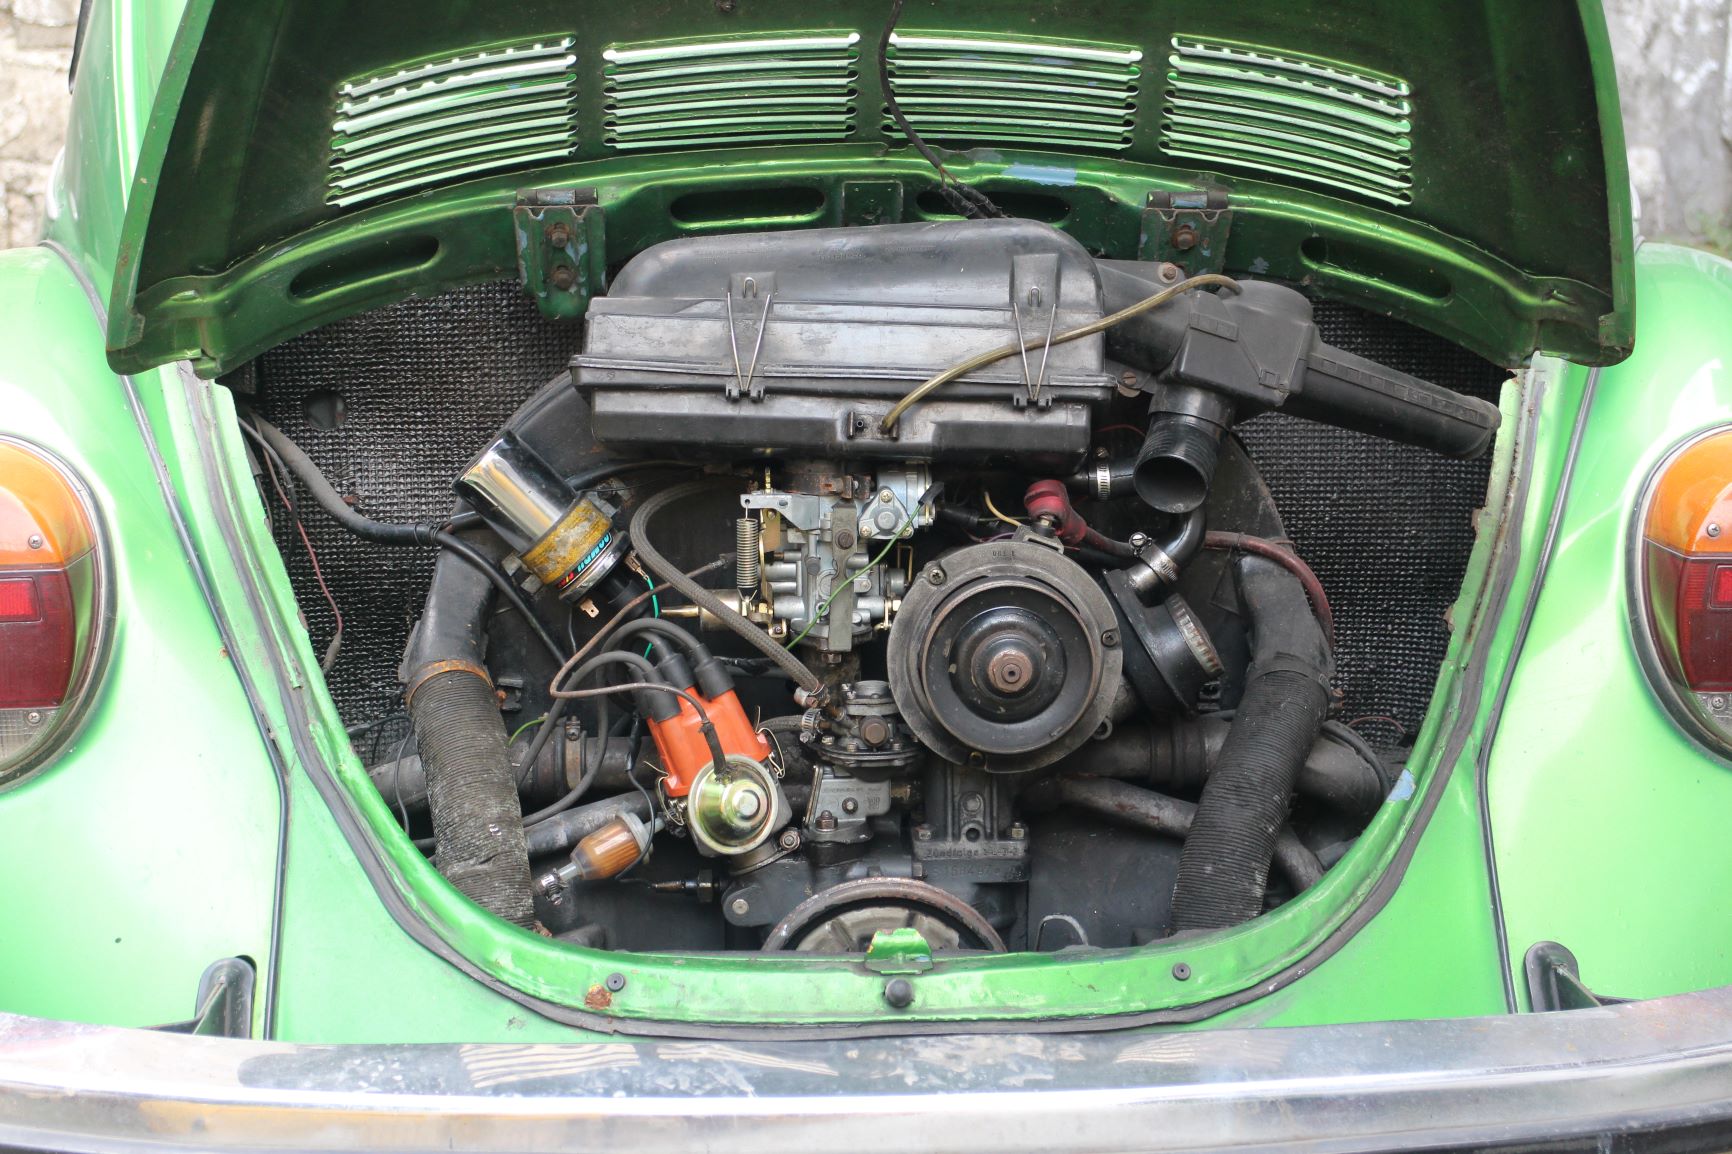
The single fan belt is a critical part of an air-cooled VW flat-4 engine. The fan belt turns the alternator that handles the electrical needs of the car while it also turns the cooling fan that pushes air throughout the passages around the engine tin to cool the motor. Replacing the fan belt takes just a few minutes with a 21mm box wrench and a screw driver. To loosen the nut that holds the front half of the alternator pulley, jam the screwdriver between the notch at the back of the pulley and the alternator housing to keep the pulley from turning. Take care not to touch the electrical windings inside the alternator with the tip of the screwdriver. With the box wrench, turn the 21mm nut counterclockwise until it loosens, and then further loosen the nut using your fingers, taking care not to drop the nut, metal cap and spare washers. Pull the front half of the pulley free while minding the number of washers between it and the rear half of the pulley. These washers are used to adjust the tension of the fan belt.
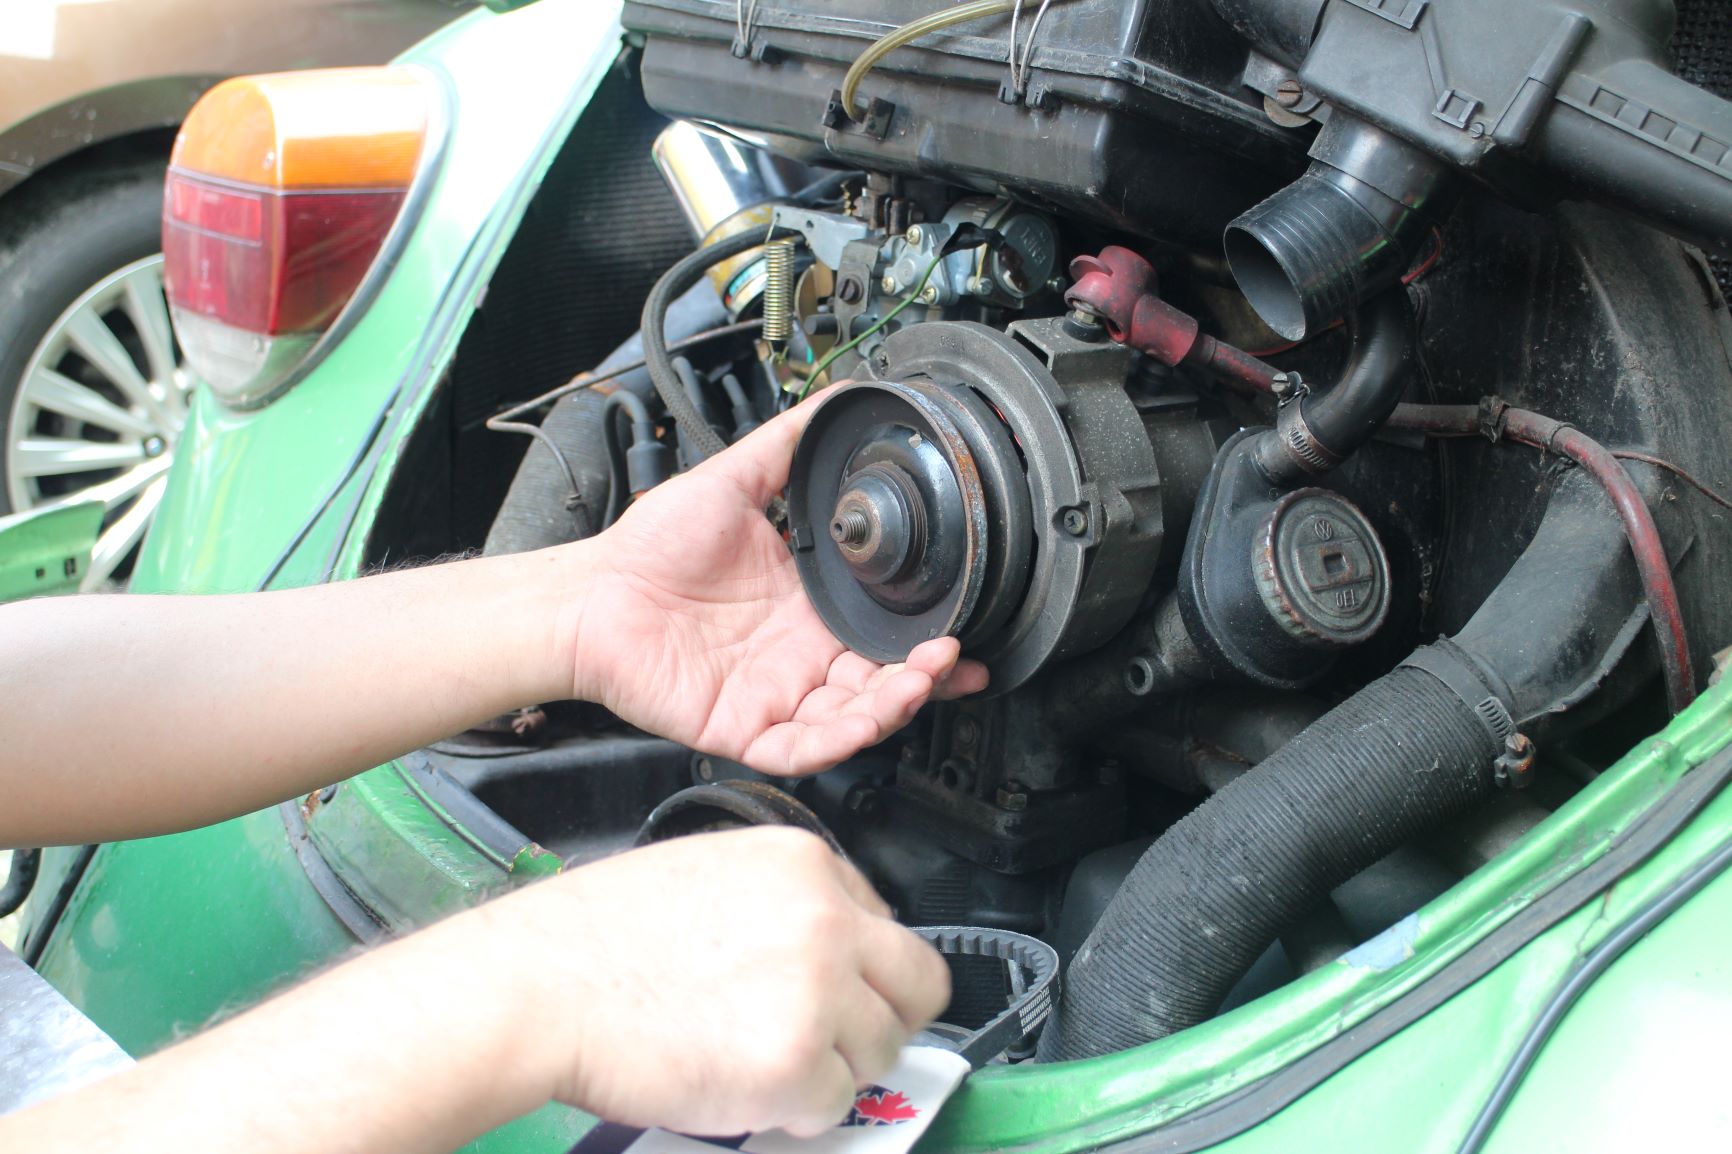
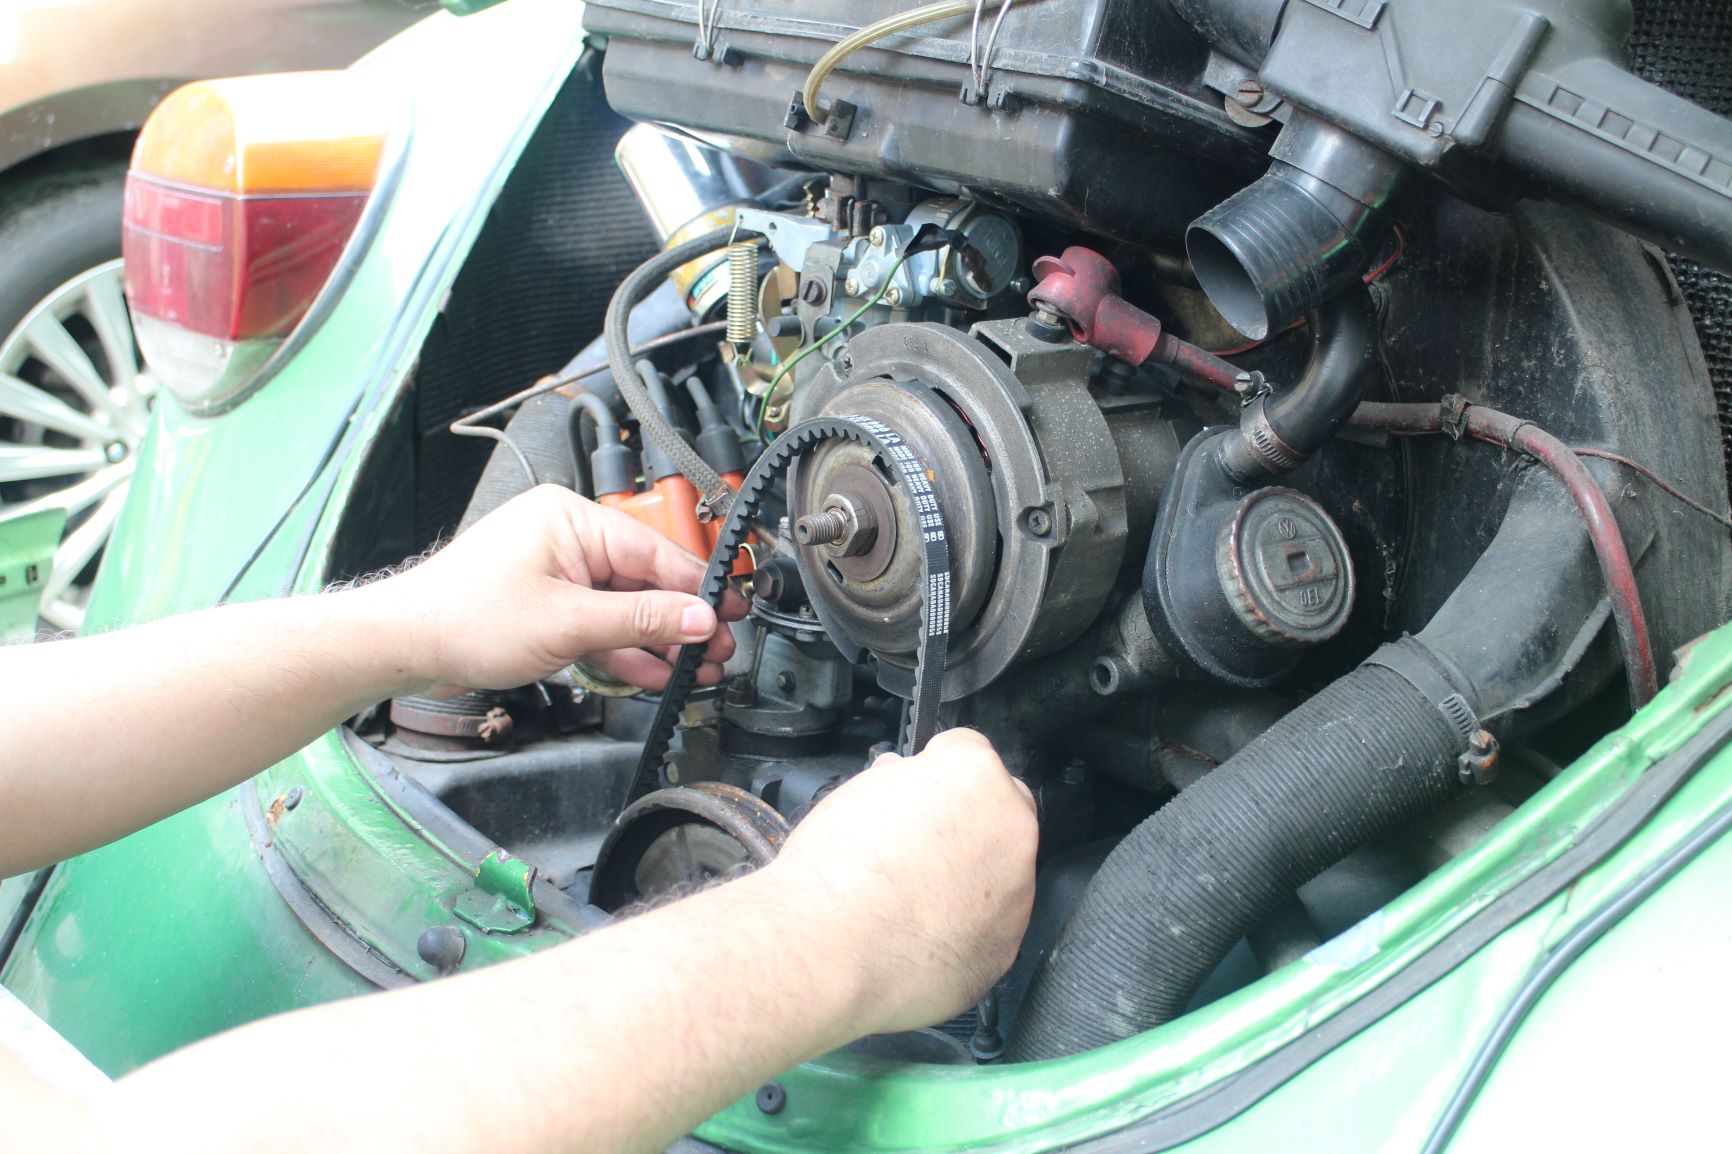
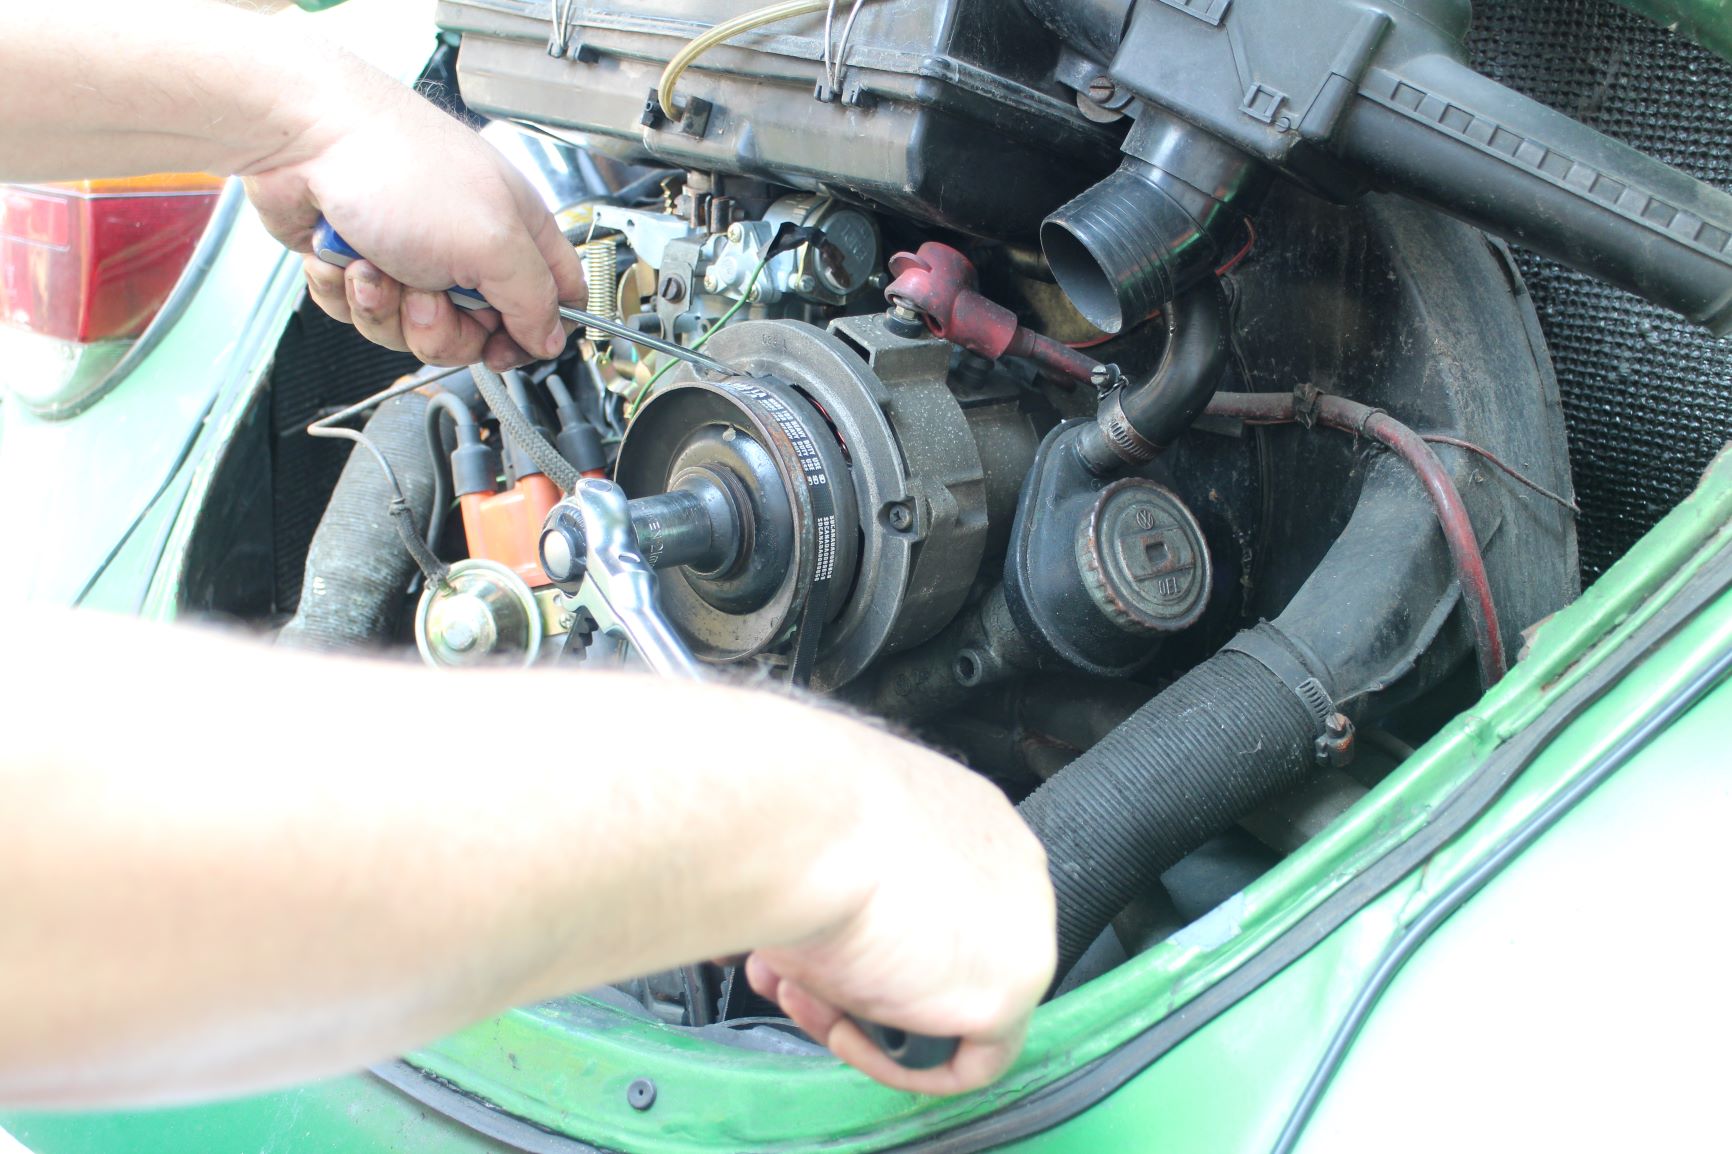
With the front half of the alternator pulley removed, fit the new fan belt between the groove of the crankshaft pulley first and then position the top half around the alternator pulley. Insert the washers on the shaft and refit the front half of the alternator pulley, followed by the spare washers, cap and nut. Finger tighten the nut clockwise until it’s tight and then use the 21mm box wrench to tighten further. Once the nut tightens, the alternator pulley will turn and the fan belt will “pull” the crankshaft pulley and rotate the engine. To check for correct tension, twist the fan belt in the middle to a quarter turn. If the fan belt is too tight, remove the front half of the pulley again and add a washer. If the fan belt is too loose, remove a washer. Once the fan belt tension is correct, tighten the nut by jamming a screw driver between the notch at the rear half of the pulley and the alternator housing to keep the pulley from turning. Job #1 is done!

Replacing the Ignition Coil
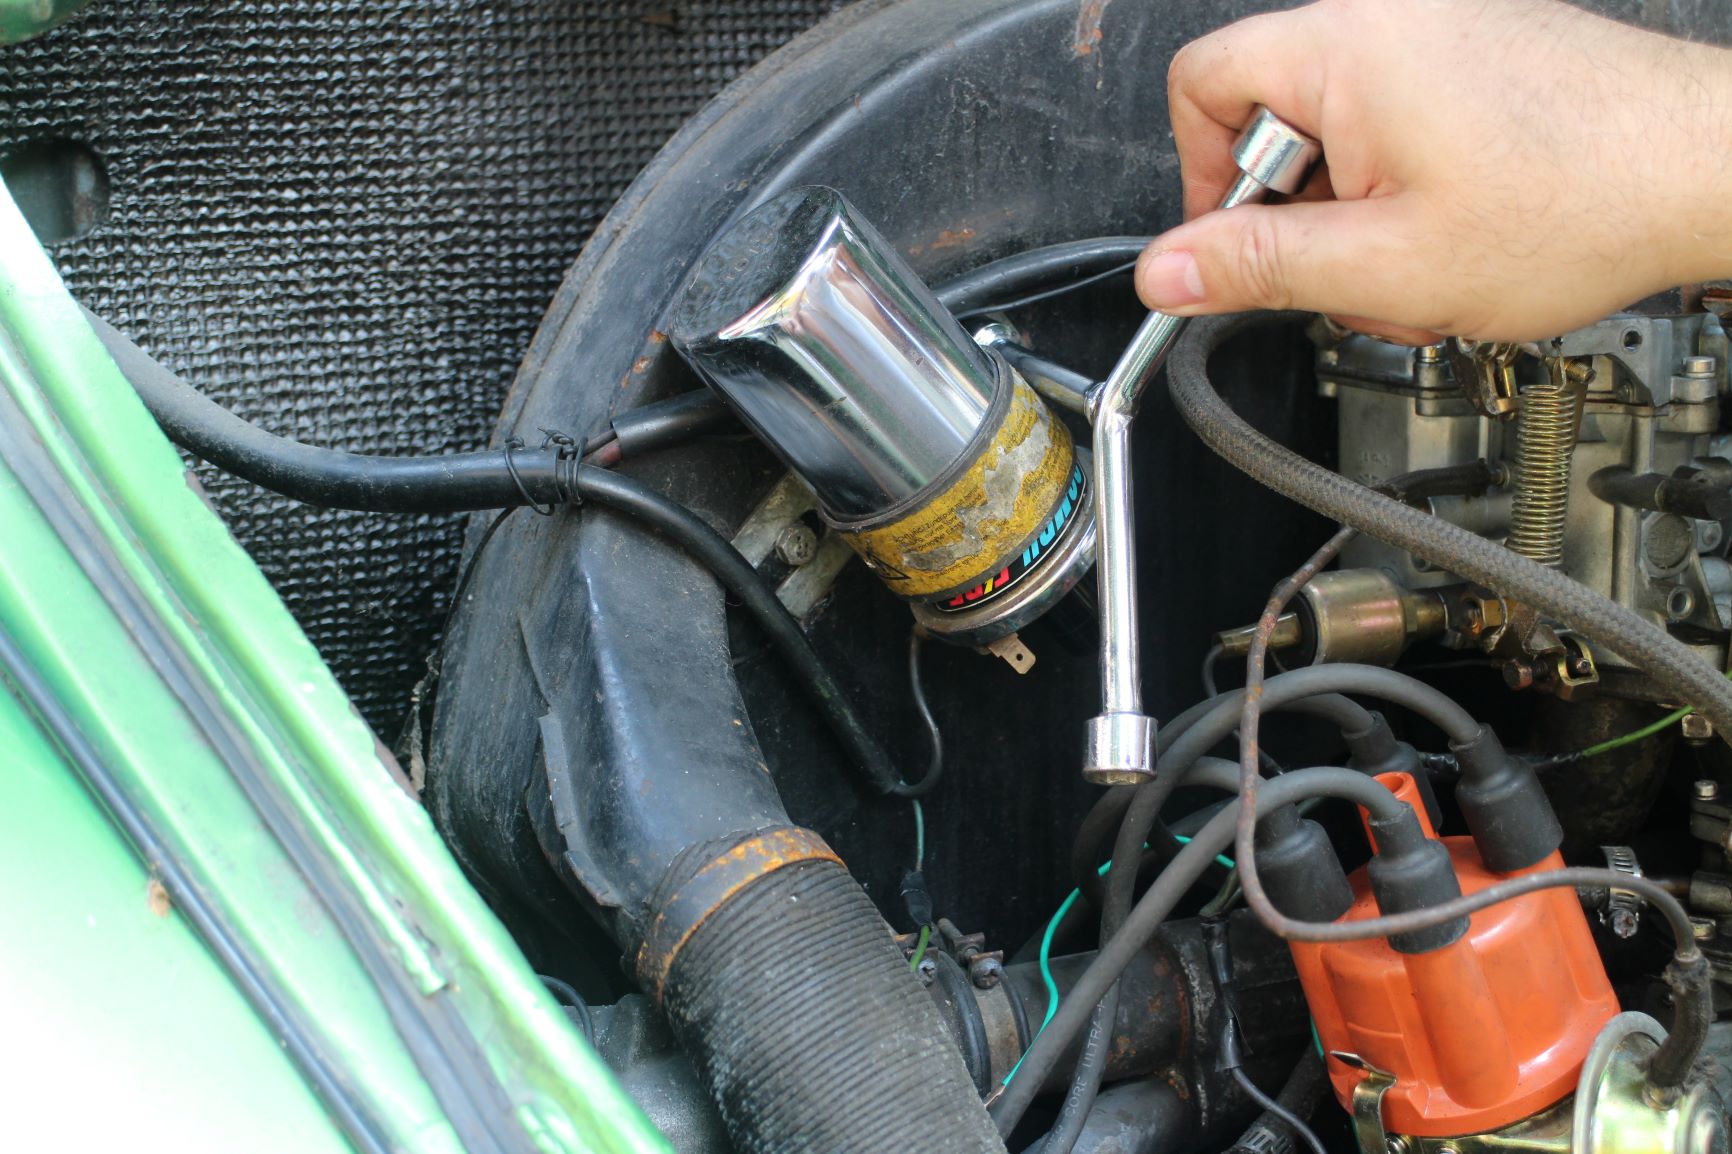
Removing the old ignition coil and replacing it with a new one is another straightforward easy job. First, remove the high-tension wire that goes from coil to the distributor and then remove the wires attached to the positive (+) and negative (-) terminals of the coil. For easy reference, the positive terminal is connected to the ignition switch while the negative terminal is connected to the distributor. Once the wires are removed, just loosen the the two 10mm bolts that attaches the bracket of the ignition coil to the engine fan housing, and then remove the old coil. Attaching the new Bosch Blue coil is simply the reverse.

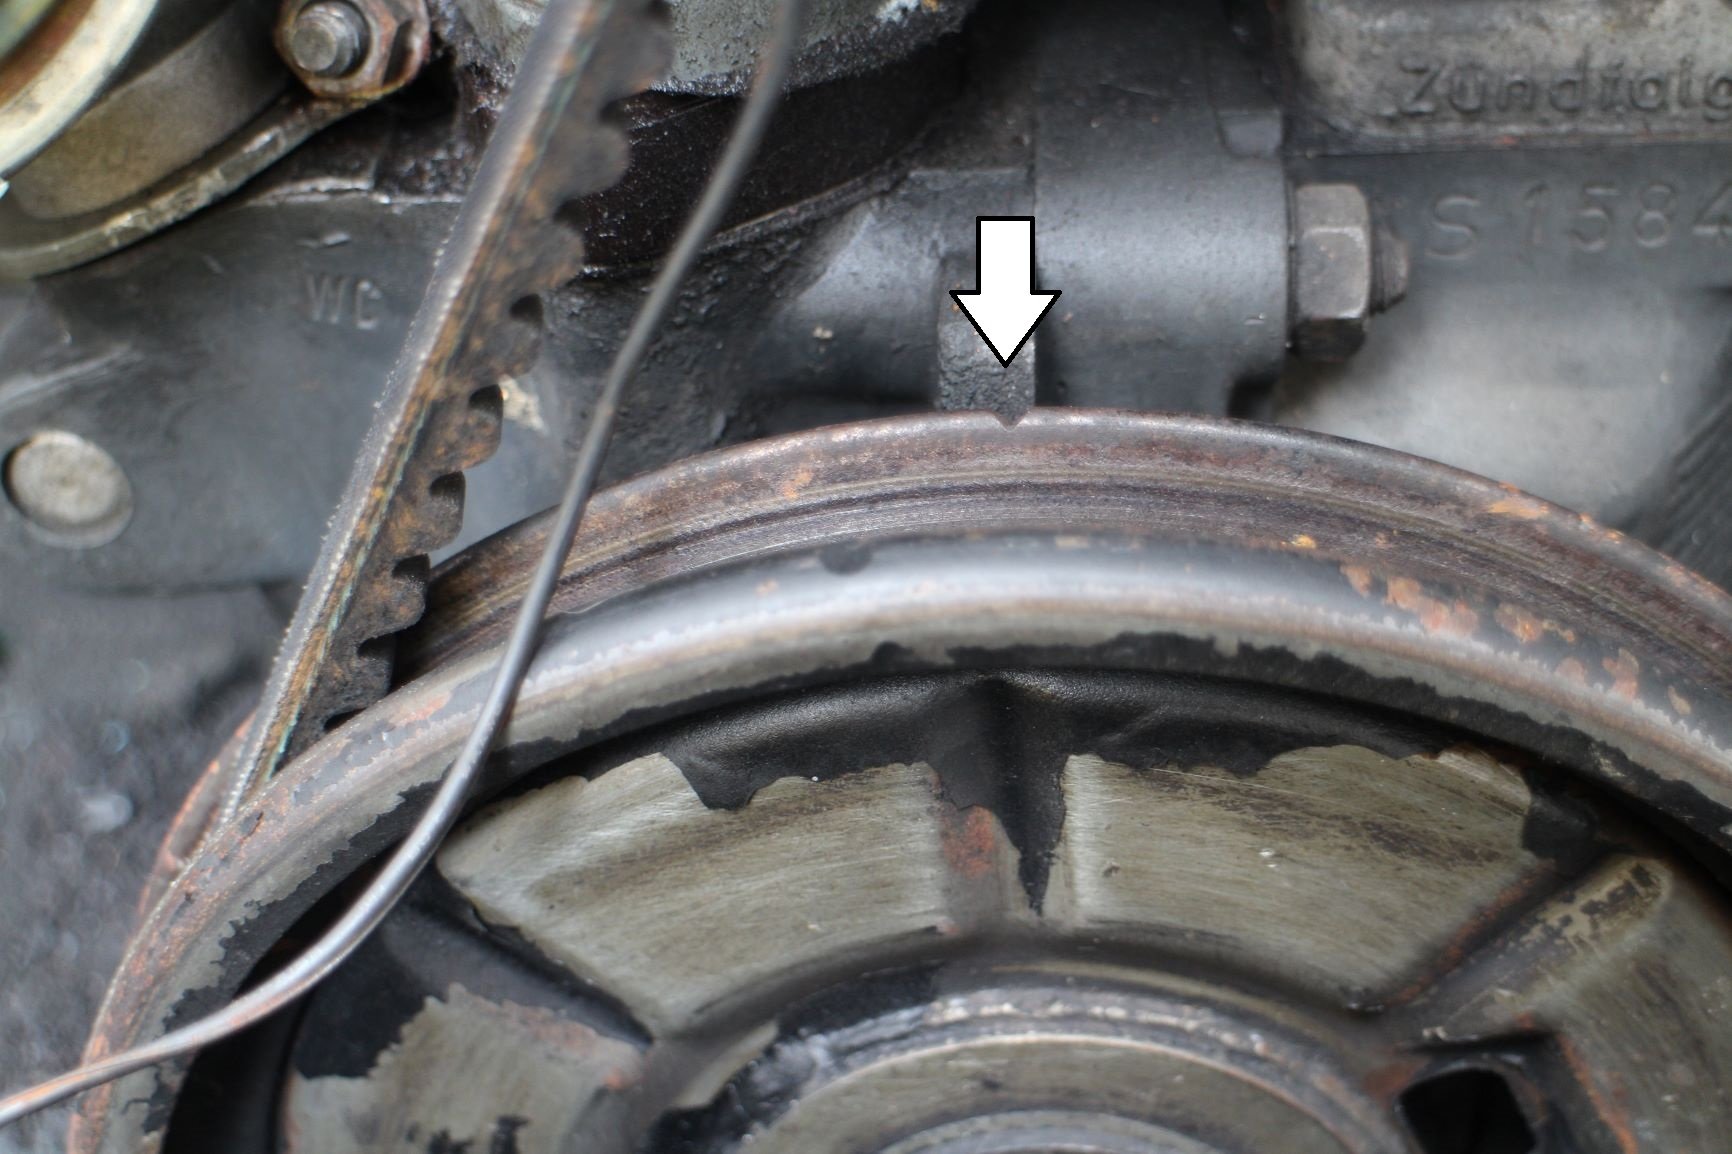
Since I’ve fiddled with the timing when I was trying to restart the engine (where I injured my middle finger), I decided to reset the timing again before I fire up the engine. Using the 21mm box wrench, I turned the alternator pulley to turn the crankshaft pulley and align the notch on it to the marker on the alternator stand to indicate that the piston in cylinder #1 is at top dead center (TDC) at the end of the compression stroke. I then attached a 12-volt test light to the positive and negative terminals of the Bosch Blue new ignition oil, loosened the 10mm nut that locks the distributor, and turned the ignition on. I slowly turned the distributor and when the light glows, it means that the timing is spot on. I tightened the 10mm bolt to lock the distributor in place and started the engine. Vroom! It started on the first try! Job #2 done!

Cleaning the Air Cleaner
I ran the engine up and down the rev range to fully circulate the oil and burn off the carbon deposits inside the cylinders, and then left it to idle for a while. After I turned it off, I made sure that all the nuts and bolts were tight and then saw how dirty the the air cleaner was. I took it apart, washed the plastic components with soap and water, and reassembled it. I temporarily reinstalled the air filter element after I cleaned and aired it because there was no brand new replacement available. I’ll replace the old but serviceable filter element as soon as I get my hands on a new one.
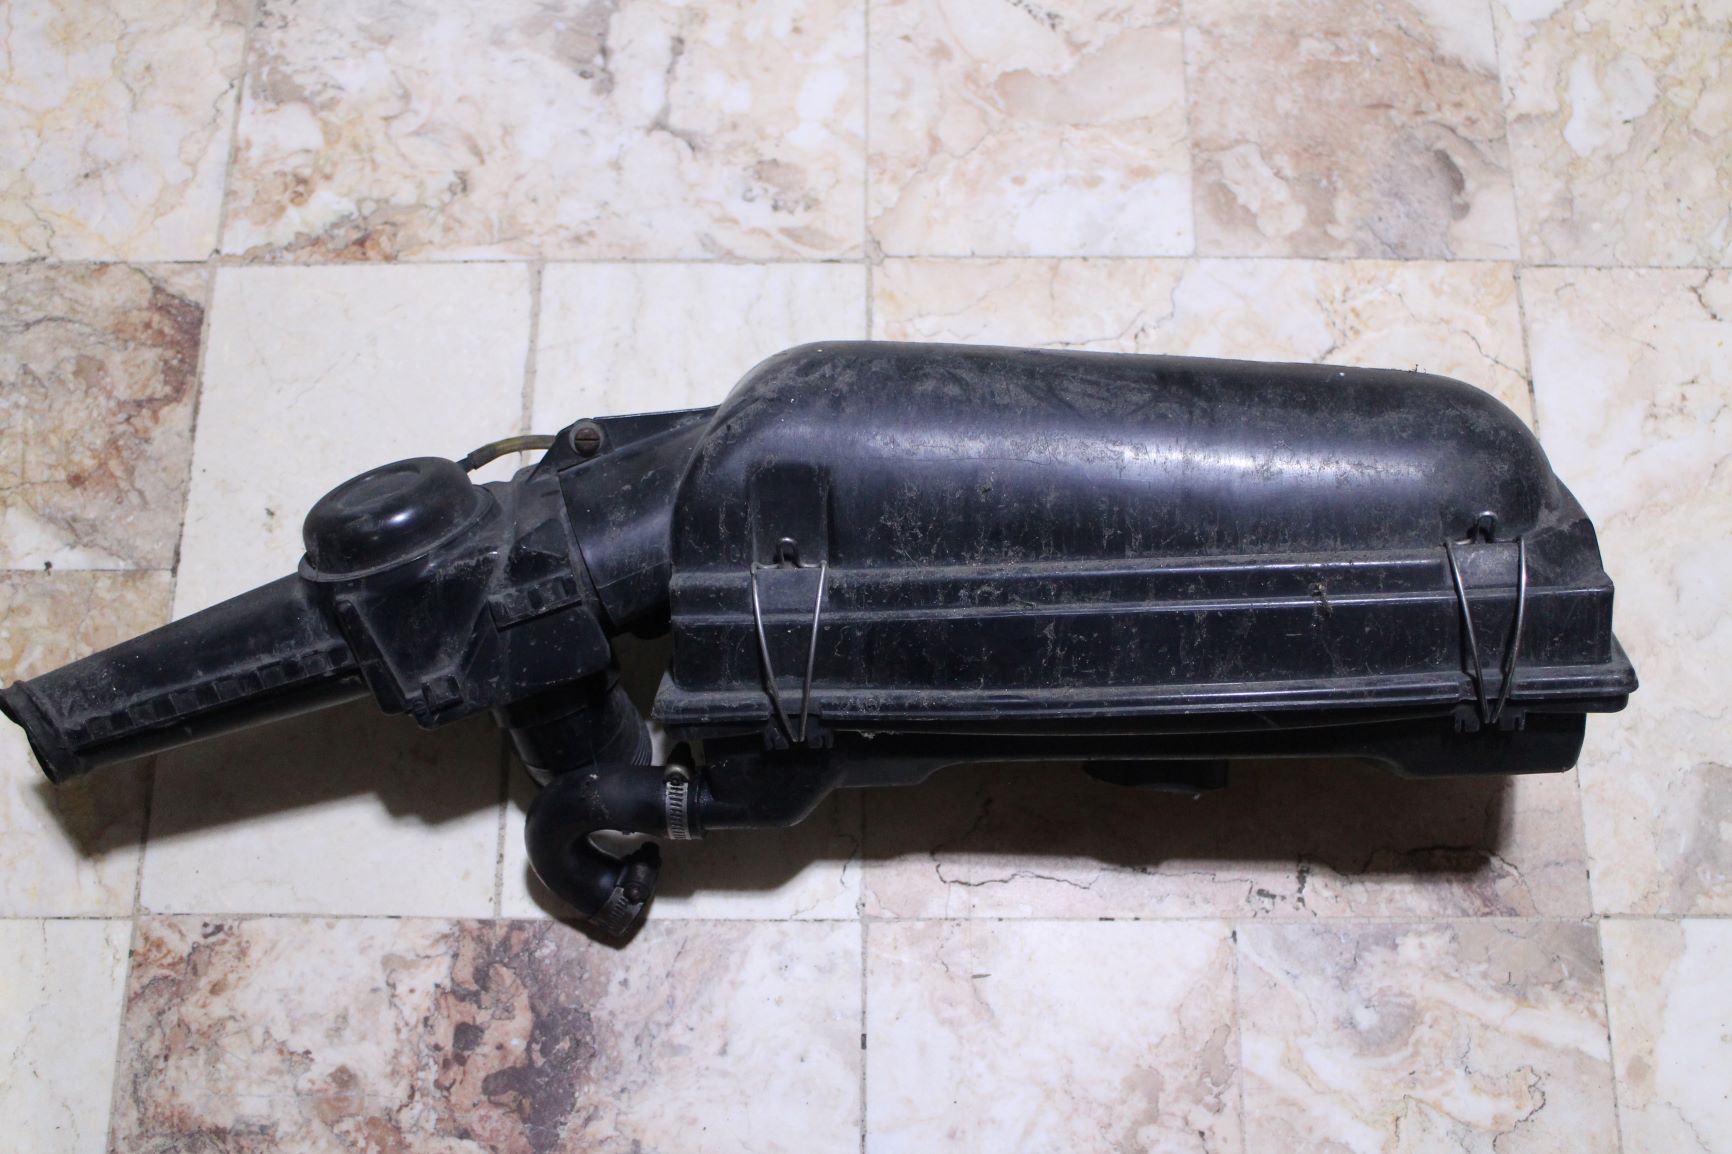
The air cleaner assembly was dusty and oily after several years of use and several months of non-use.
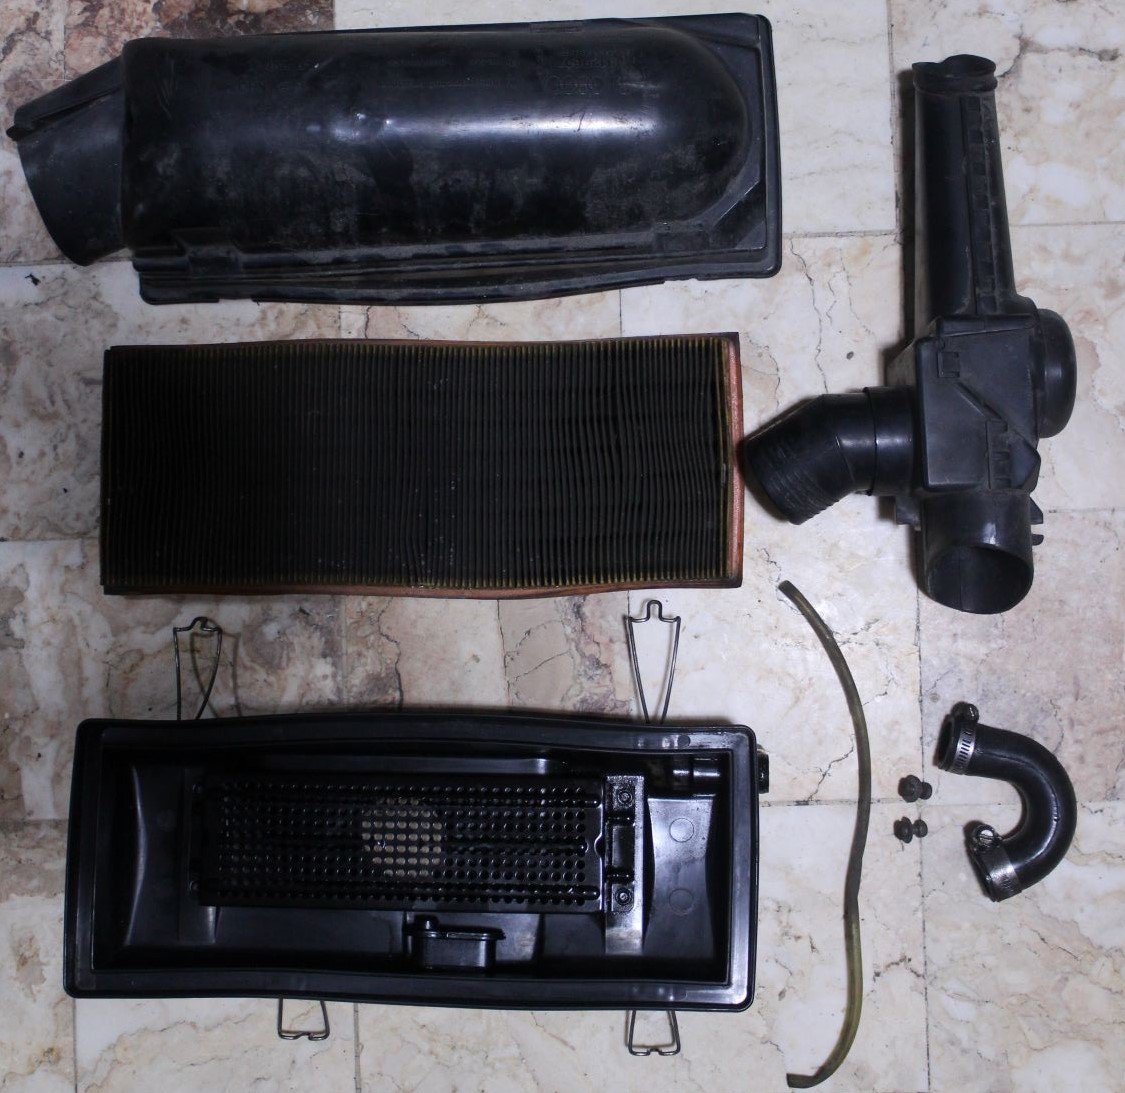
The air cleaner can be disassembled into three major components – the upper housing, bottom housing, and the air inlet with the solenoid valve. The filter element in the middle is dirty but serviceable.
For easy cleaning, the heater hose pipe disconnects from the air inlet with an ingenious insert-twist-and-lock edge.

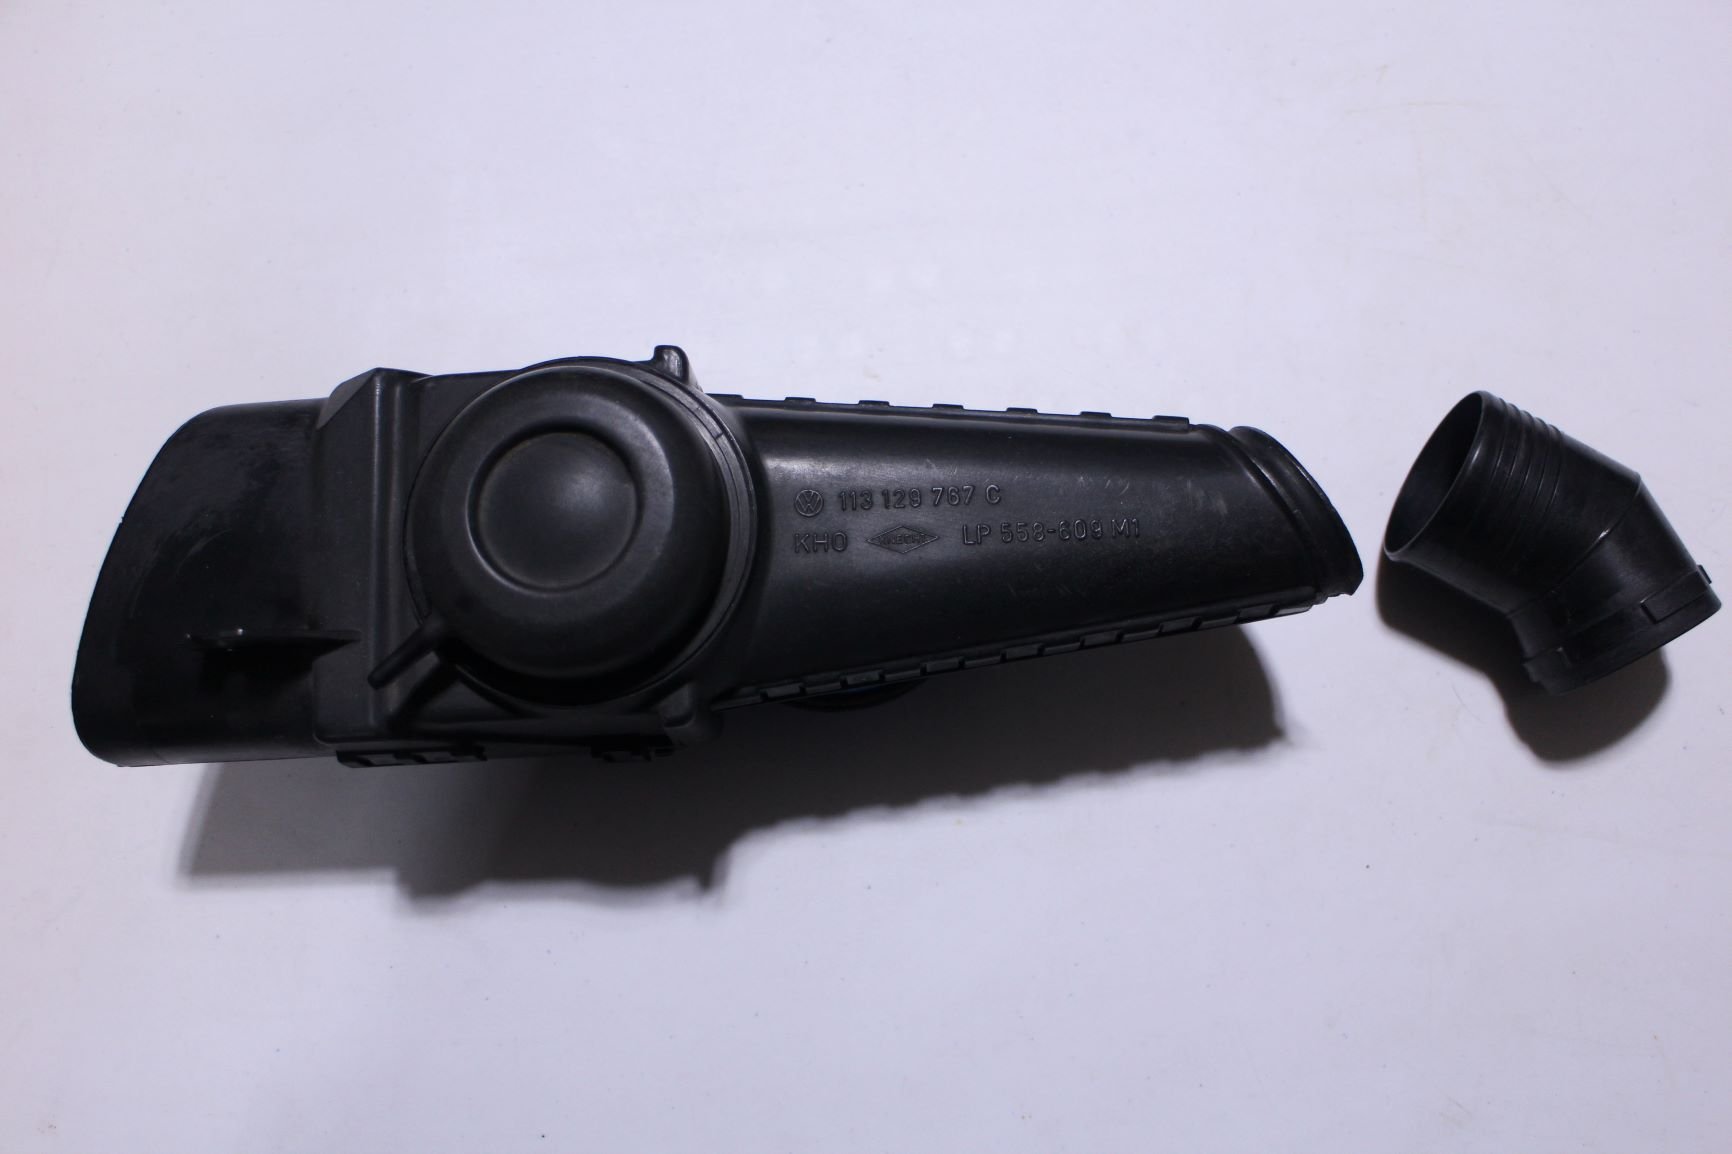
After cleaning, we reconnected the heater pipe to the air inlet component…
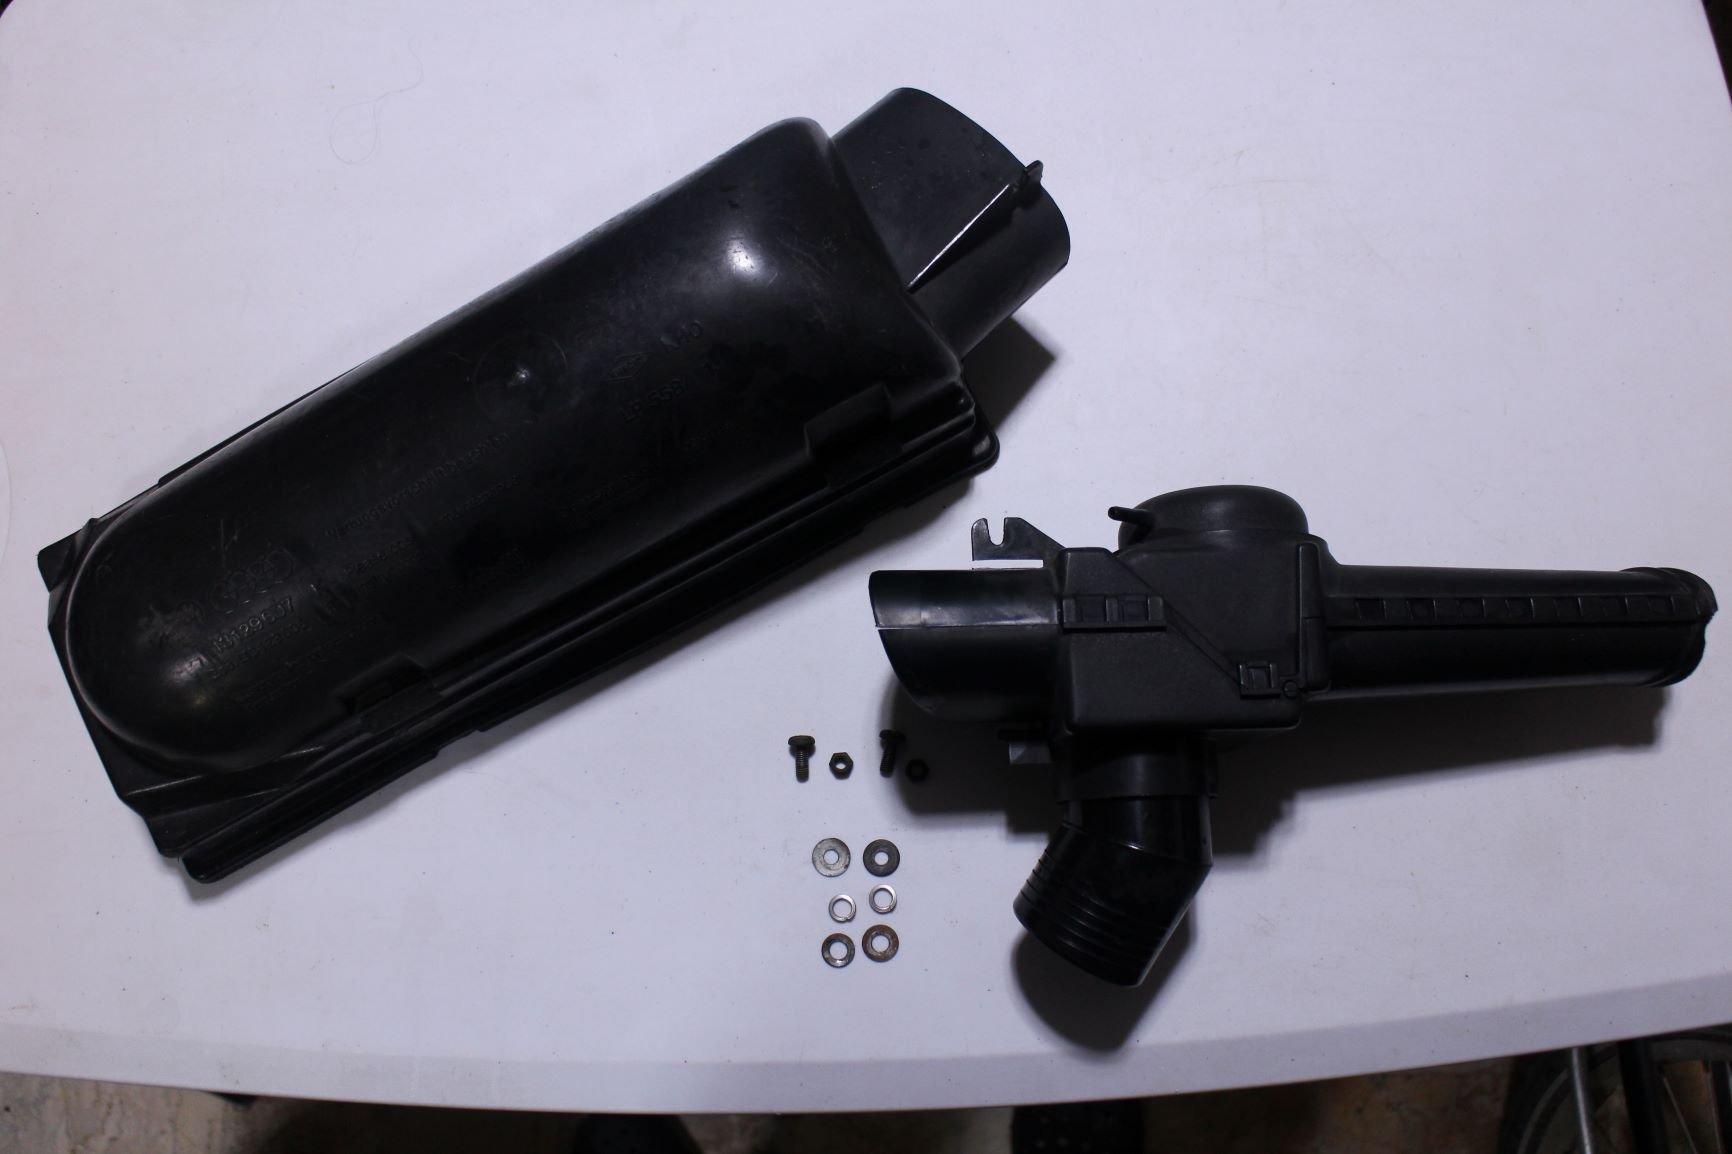
… and connected it the newly-cleaned upper housing using 8mm nuts and bolts…

… to complete the upper air cleaner assembly.
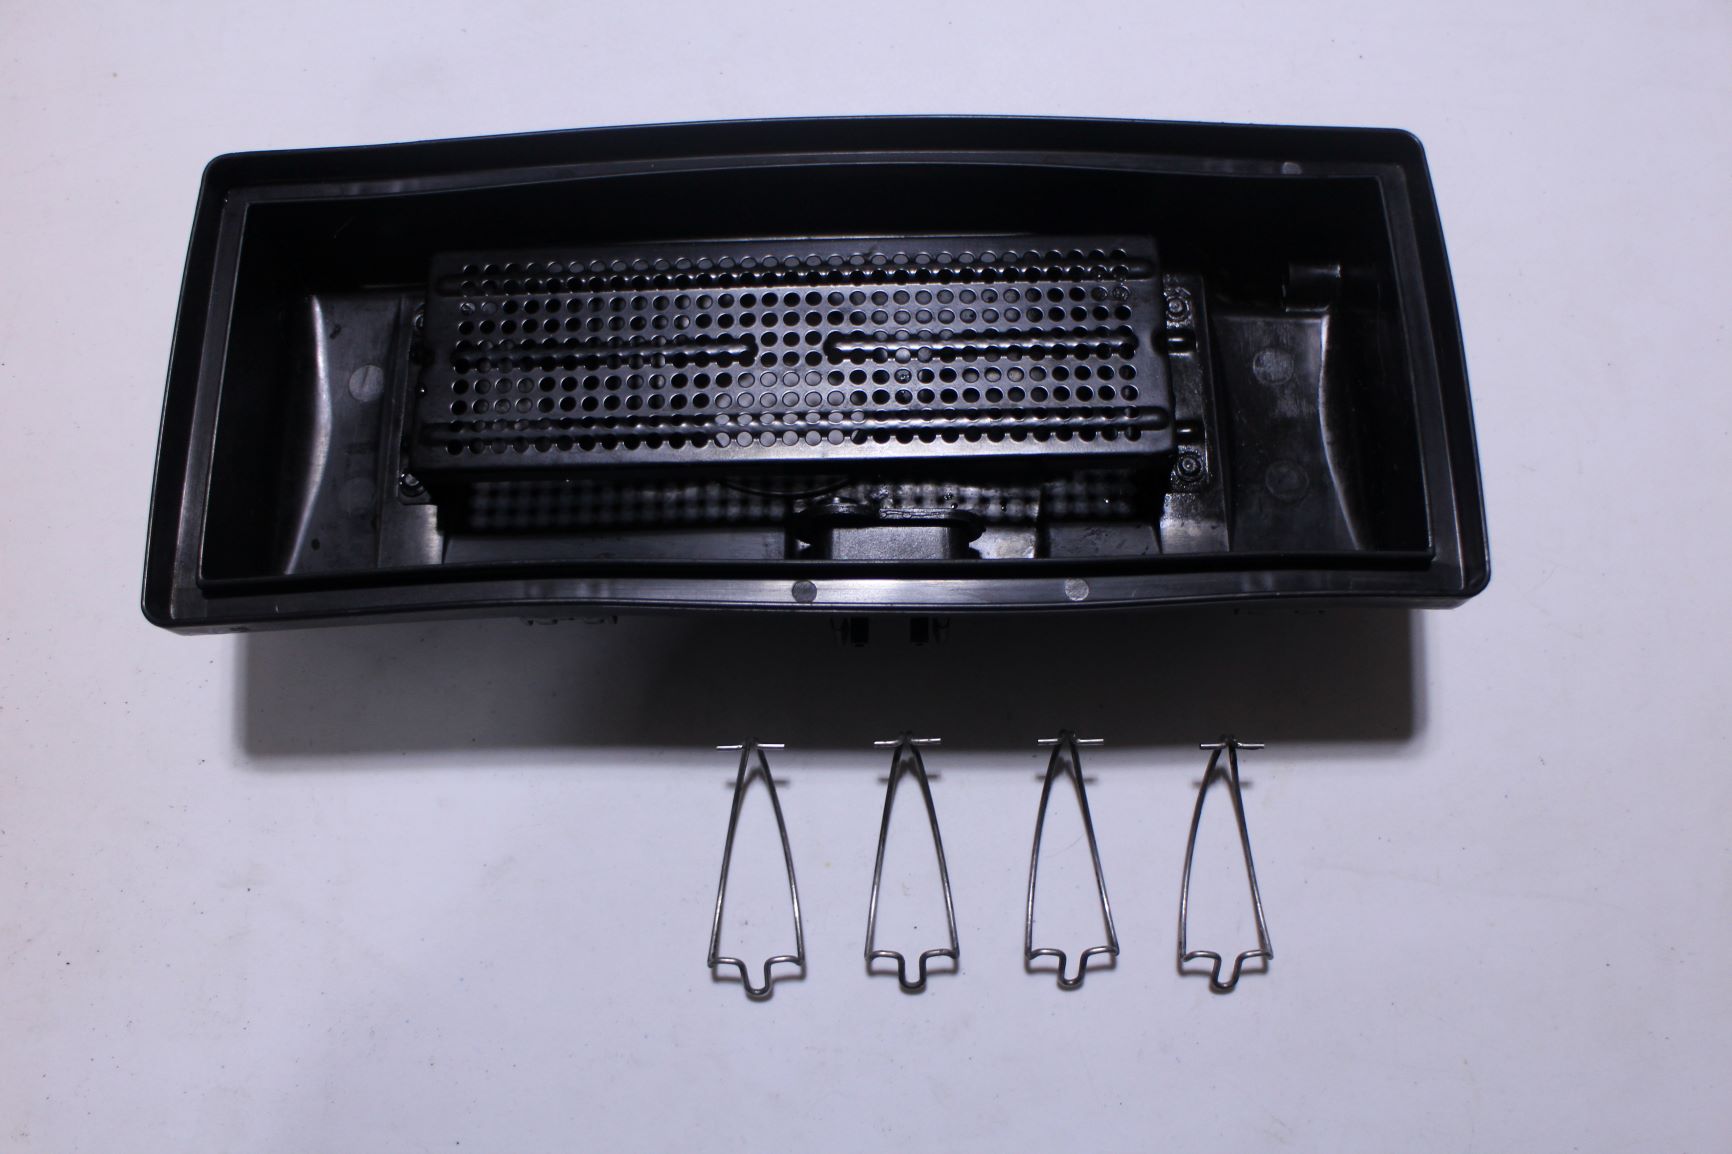
We removed the retaining clips from the bottom housing during cleaning…
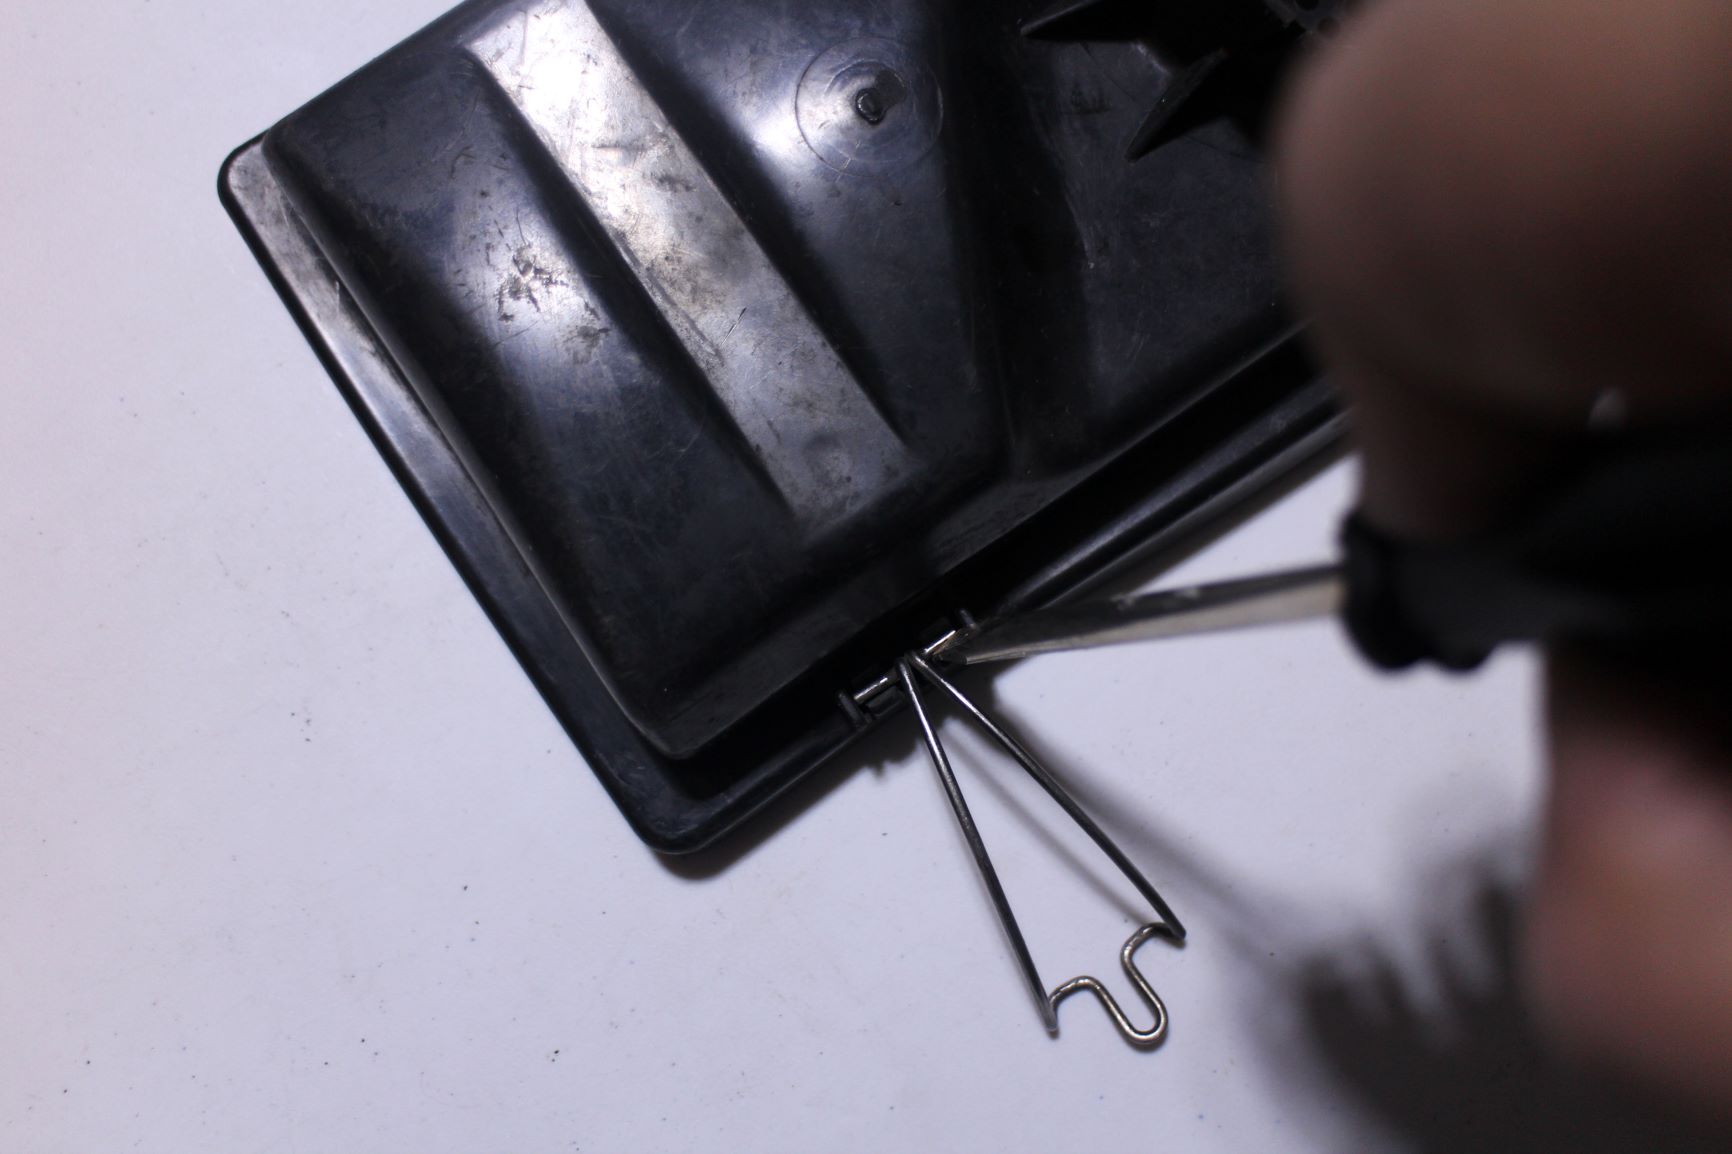
… and used the edge of a flat screwdriver to push the clips back into each slot…
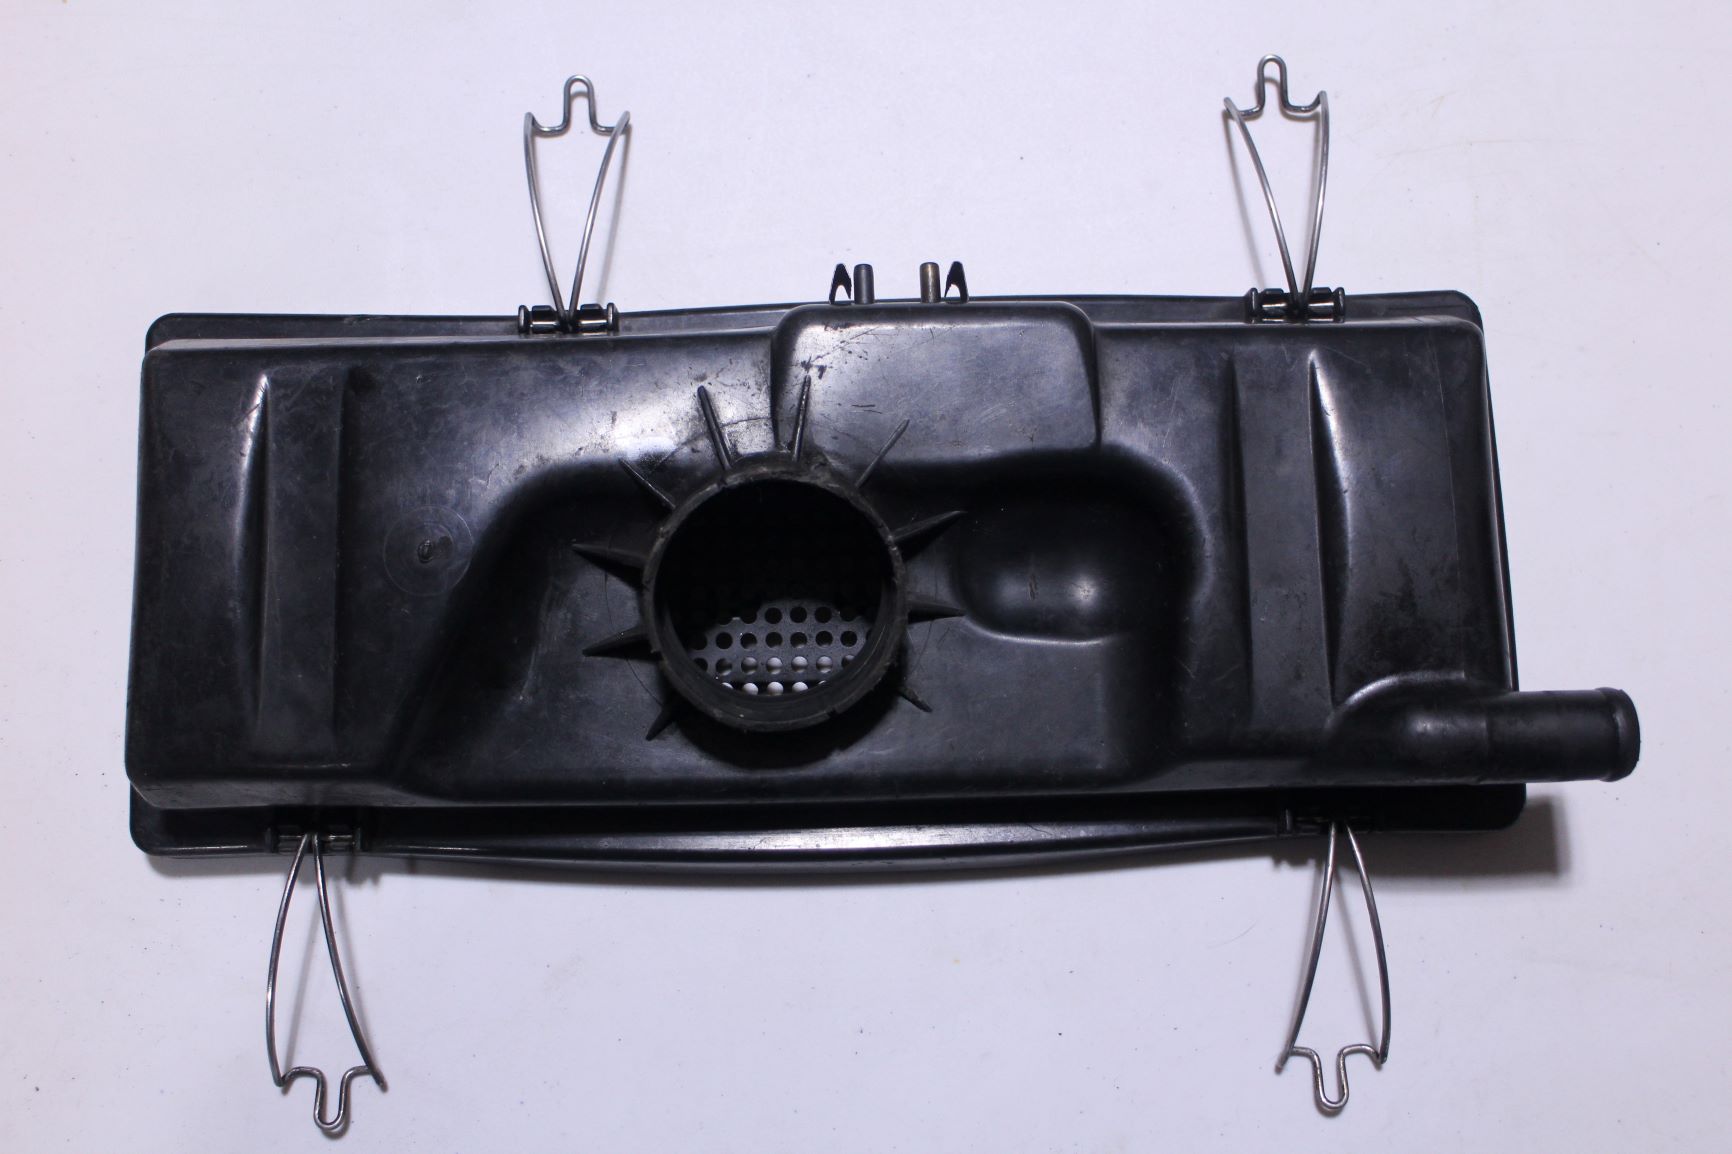
… to complete the bottom assembly.
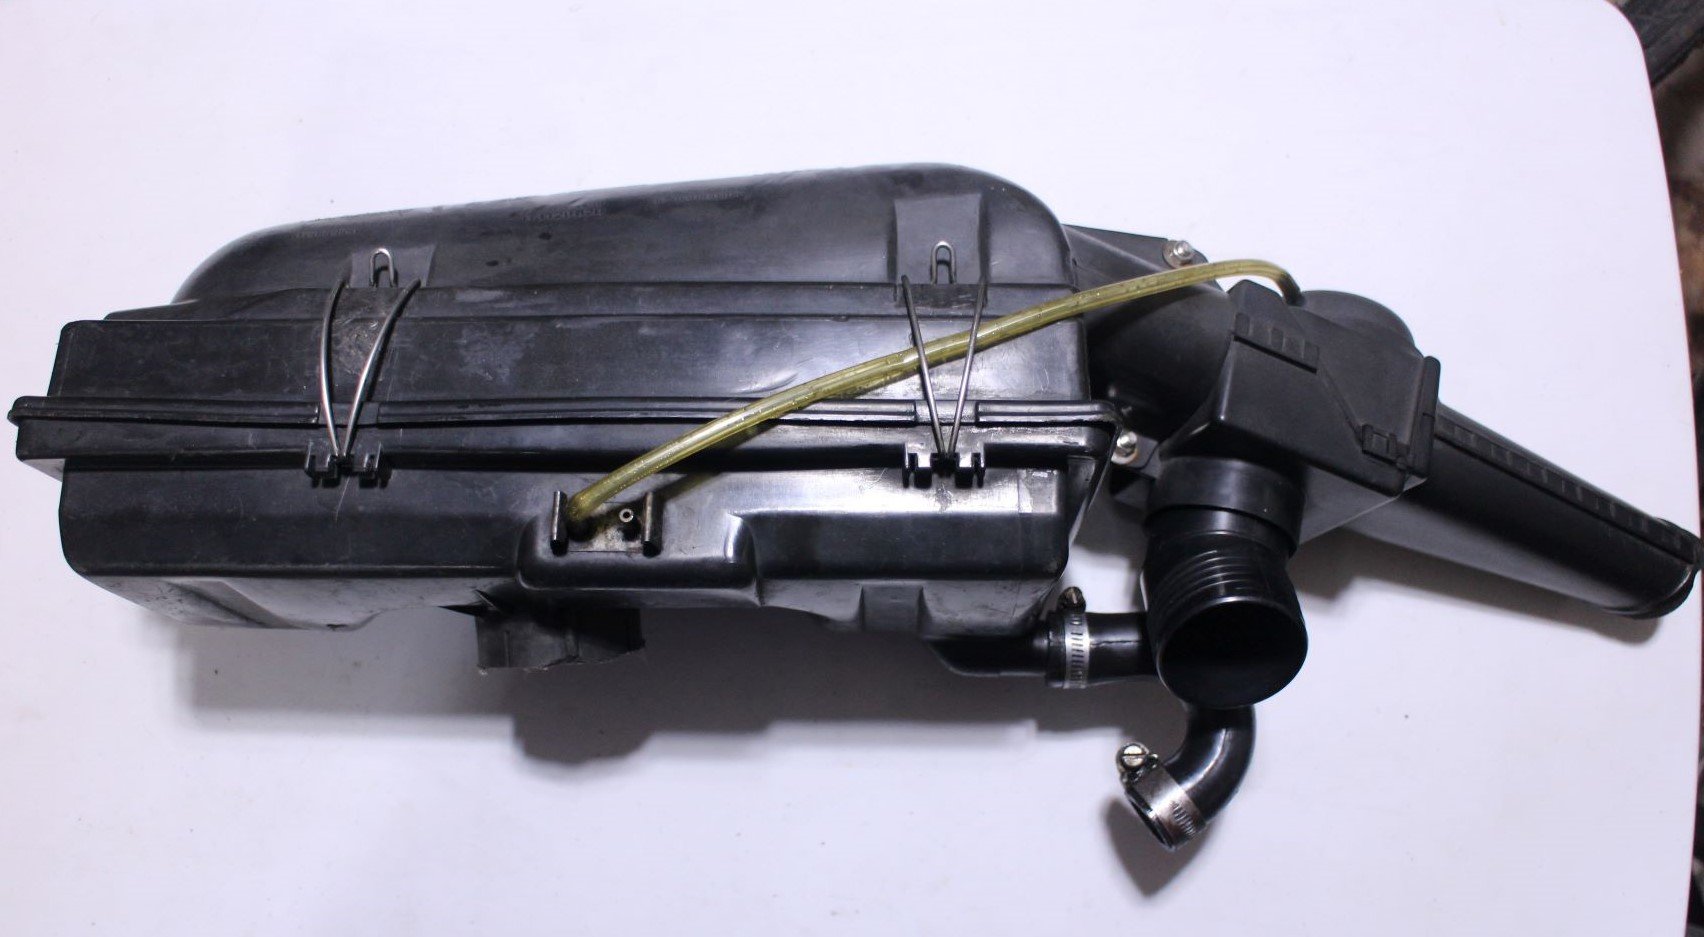
After attaching the filter element, the clear vacuum hose and the elbow-shaped oil breather hose, and then locking the retaining clips…
… I reinstalled the newly-cleaned air cleaner assembly onto the carburetor. I just need another heater hose to complete the engine bay.
Back on the Road Again
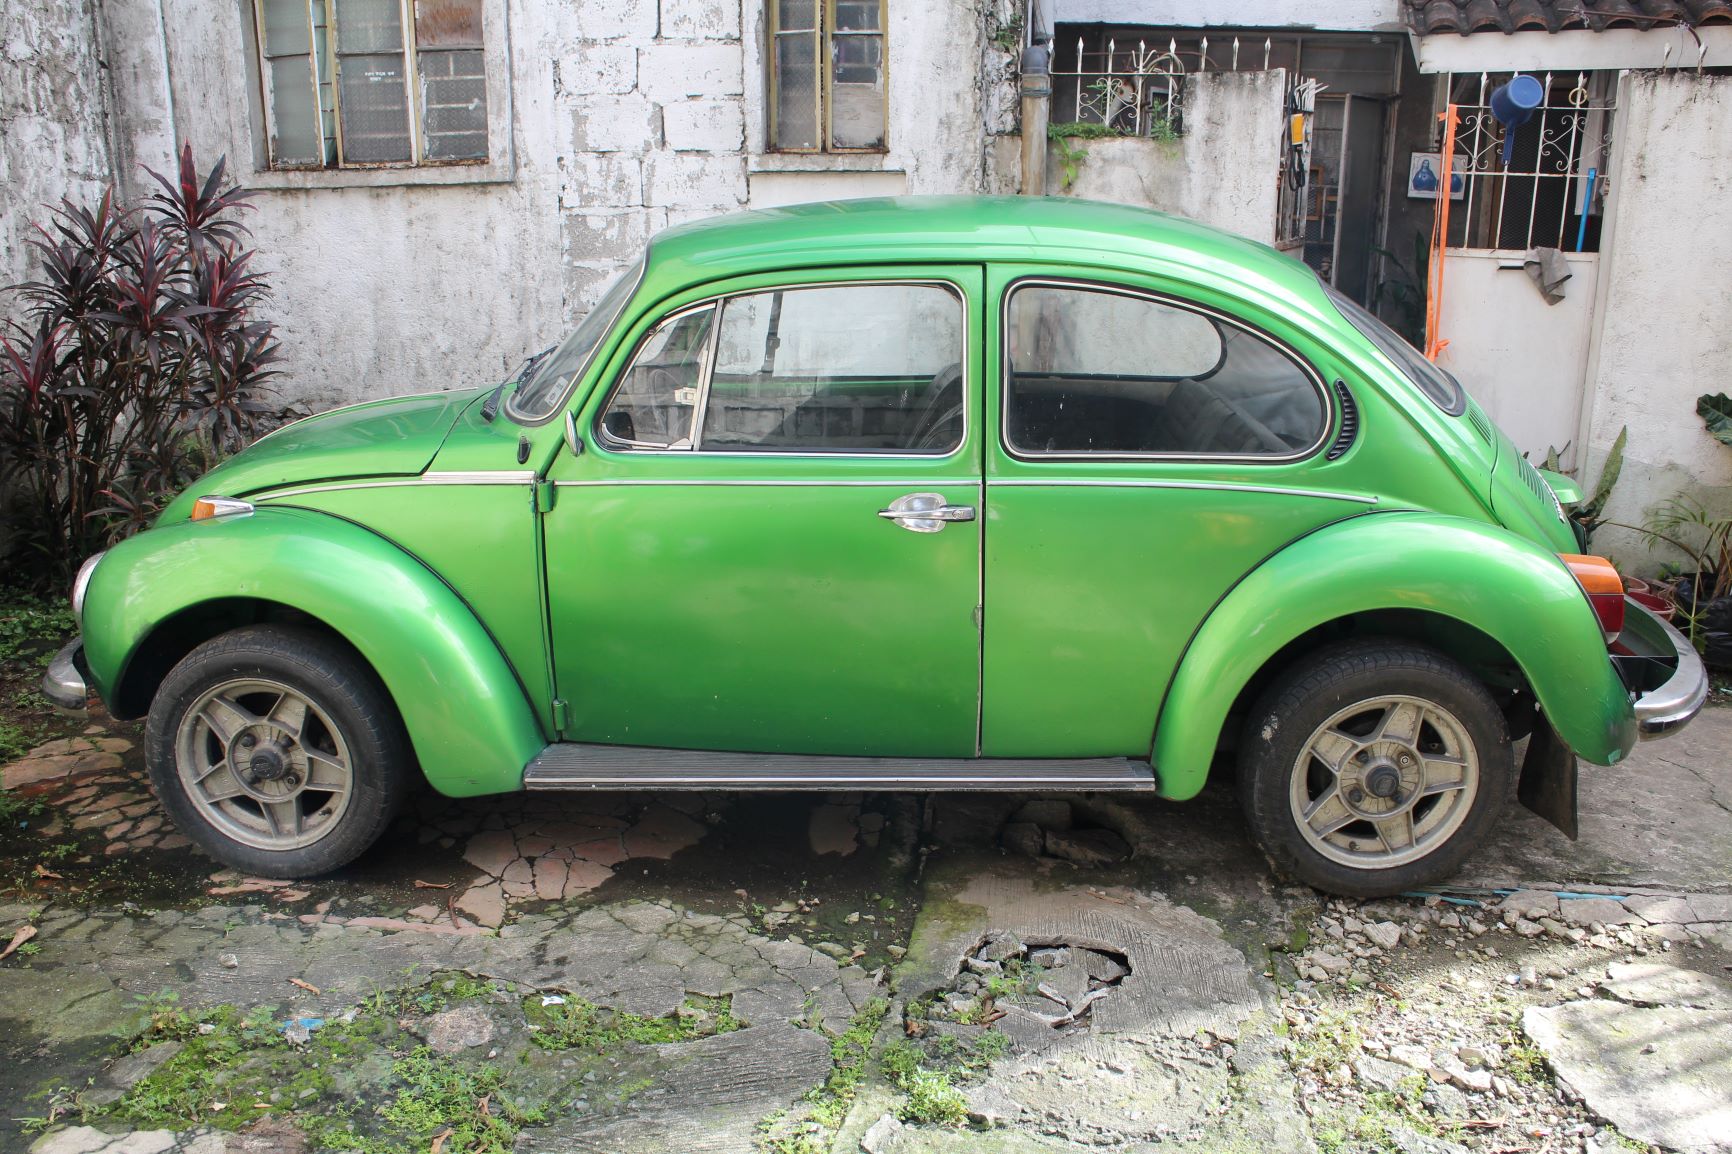
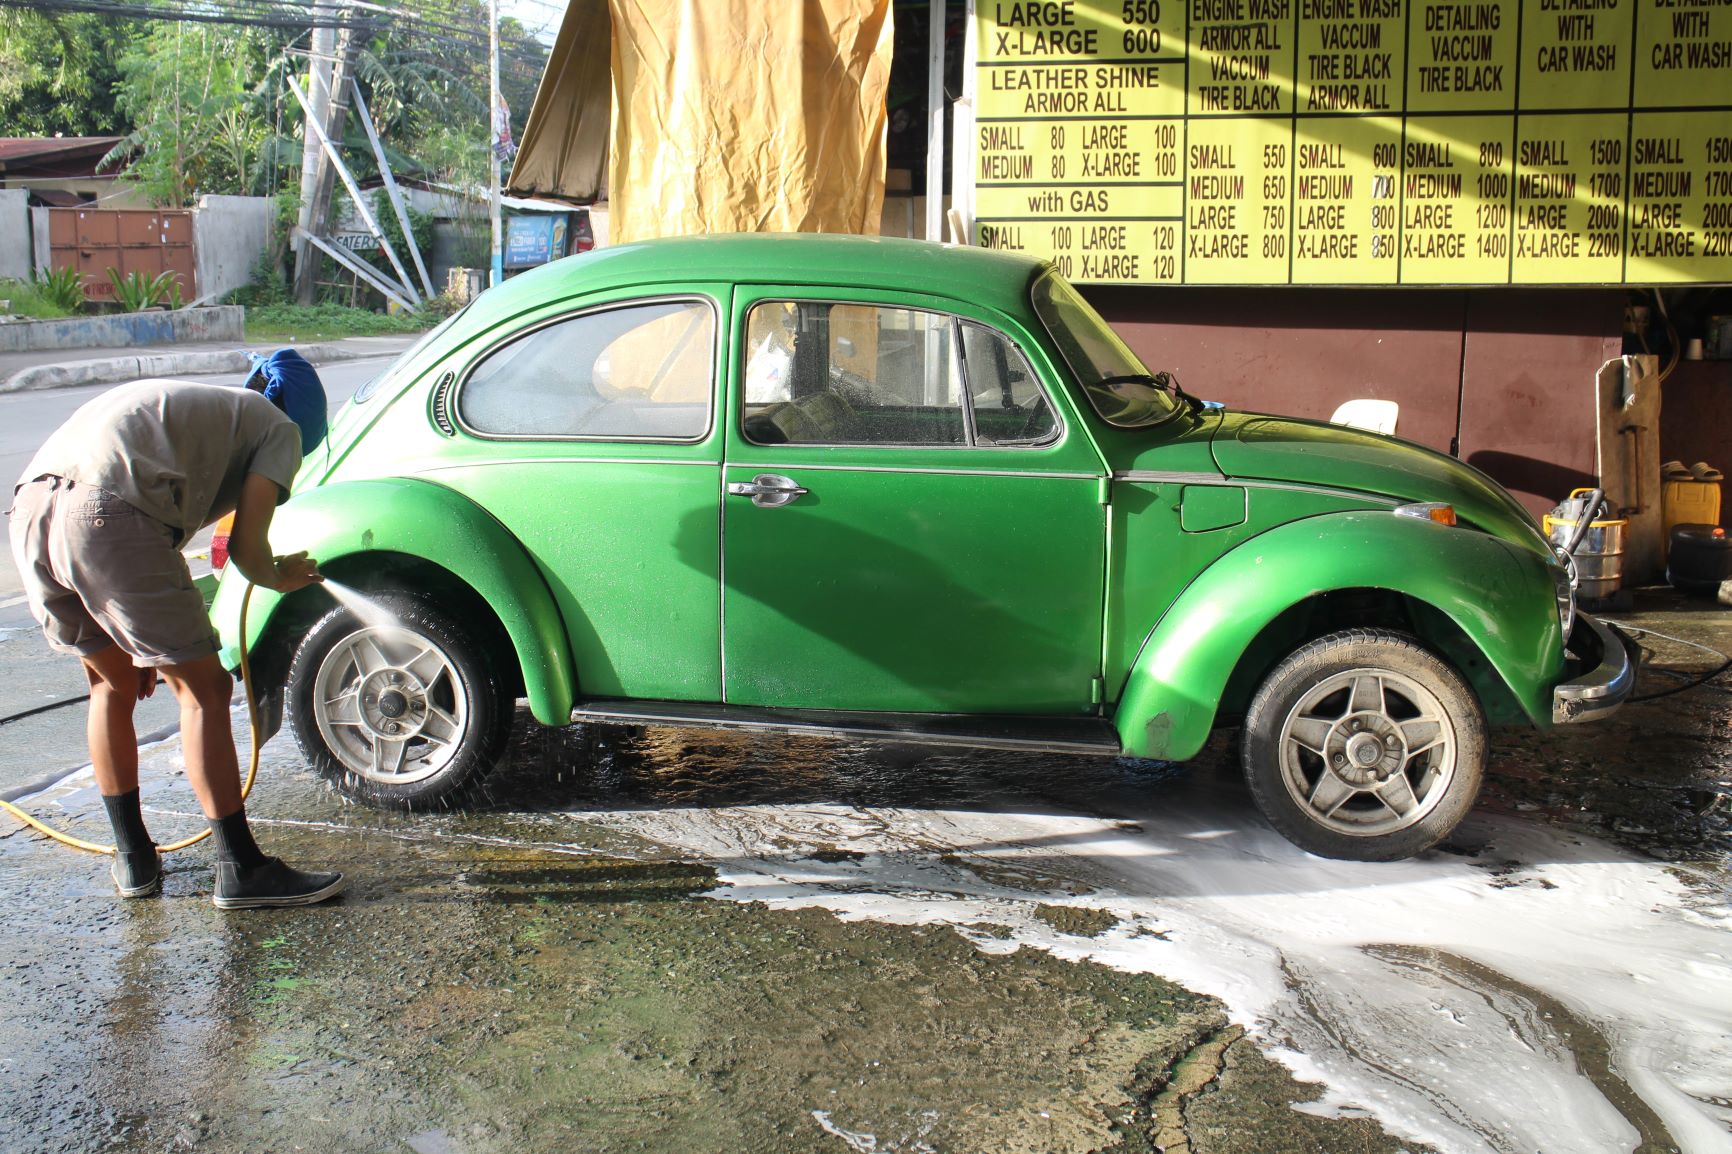
After getting the engine to start and run reliably, I took the green Bug out of the garage for the first time in three weeks. The first stop was a nearby Petron gas station along Congressional Avenue where I had the fuel tank loaded with several liters of Blaze 100 high-octane fuel. After refueling, I had the tire pressure on all the four Bridgestone Potenza tires set to 30 PSI since all of them looked soft after sitting unused for several months. The right rear tire, more particularly, looks like it has a slow leak but I’ll observe it first before taking it to a vulcanizing shop.


After the gas station, I drove towards our suki or favorite carwash because I realized that the green Bug hasn’t been washed since I got it in June 2019. On the way to the carwash, I felt the front wheels wiggle at speed, which meant that I need to look at the tie-rods and suspension bushings. The horn also gave a faint “beep” whenever I step on the brakes, which meant that there are some loose wires that are grounding the horn circuit or the horn switch on the steering wheel needs to be checked. And then, just before I drove into the carwash, the green Bug stalled in the middle of the road. The carwash boys were about to help me push the car when the engine started again and I was able to drive it into the carwash bay.
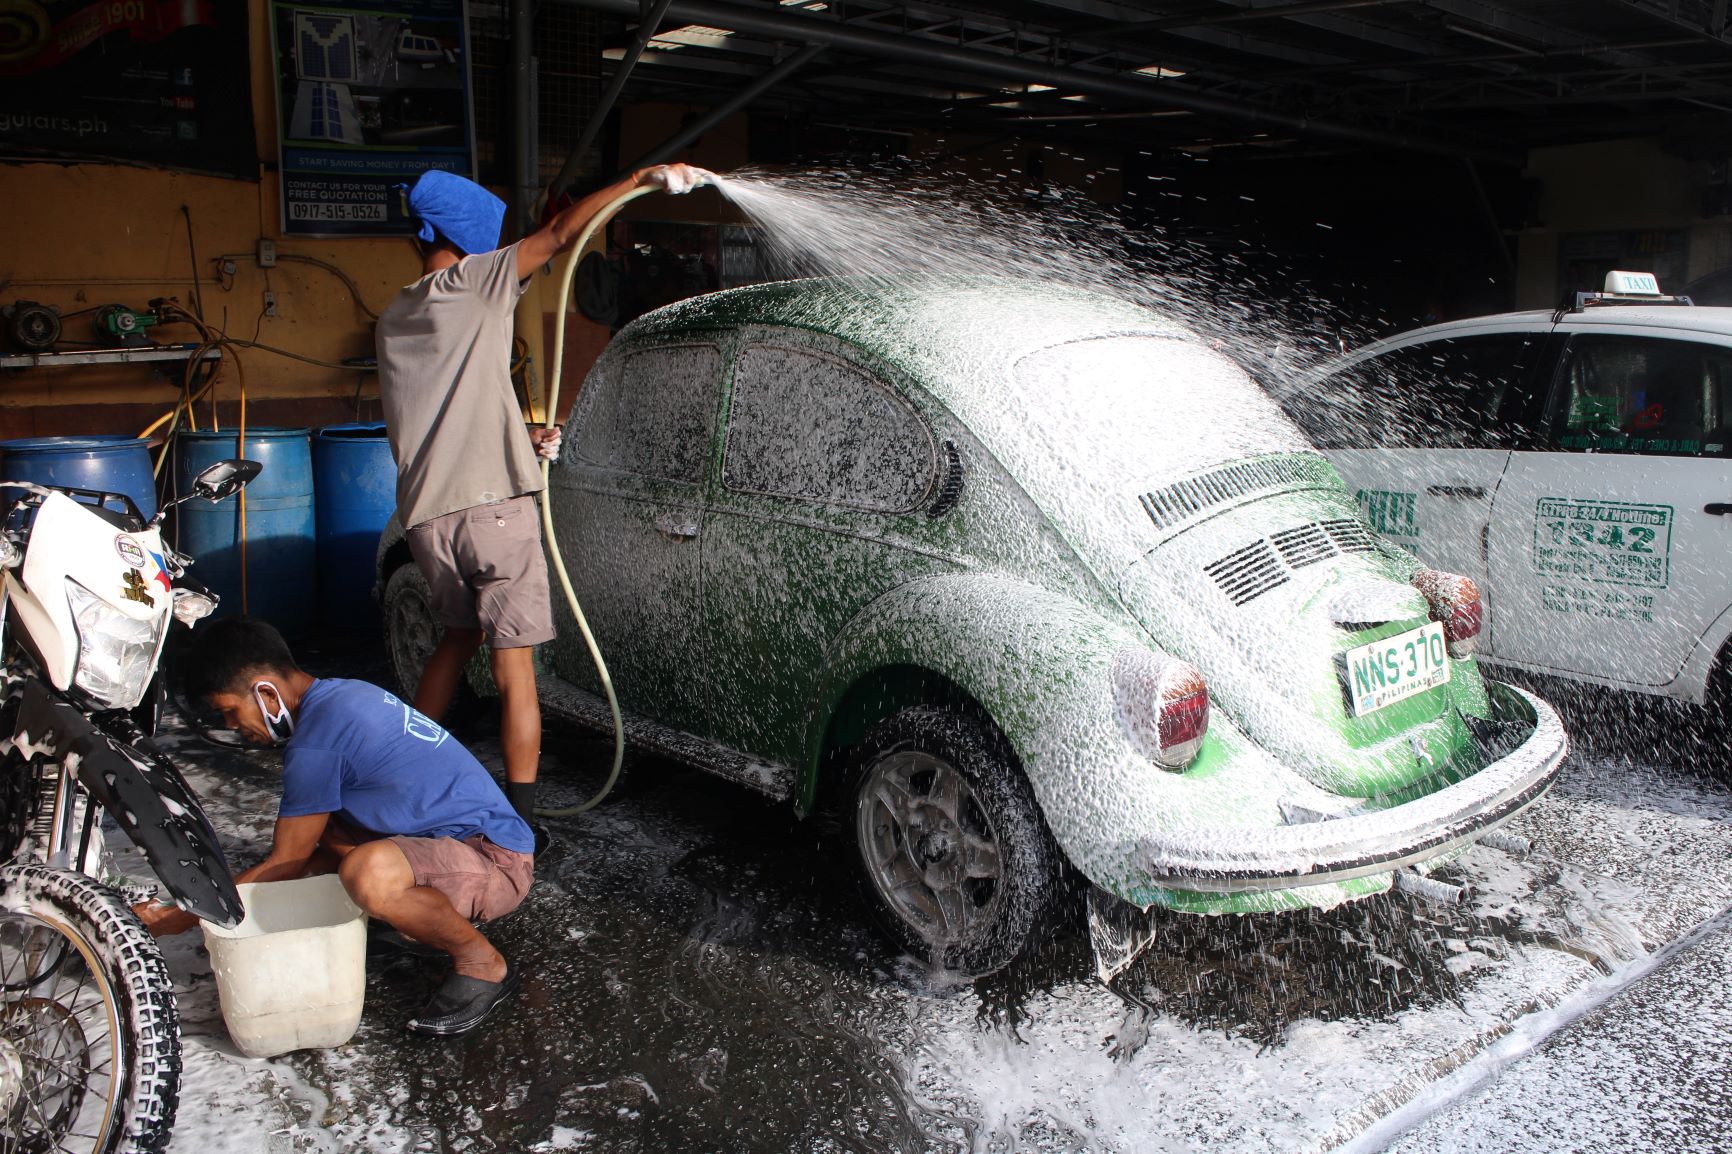
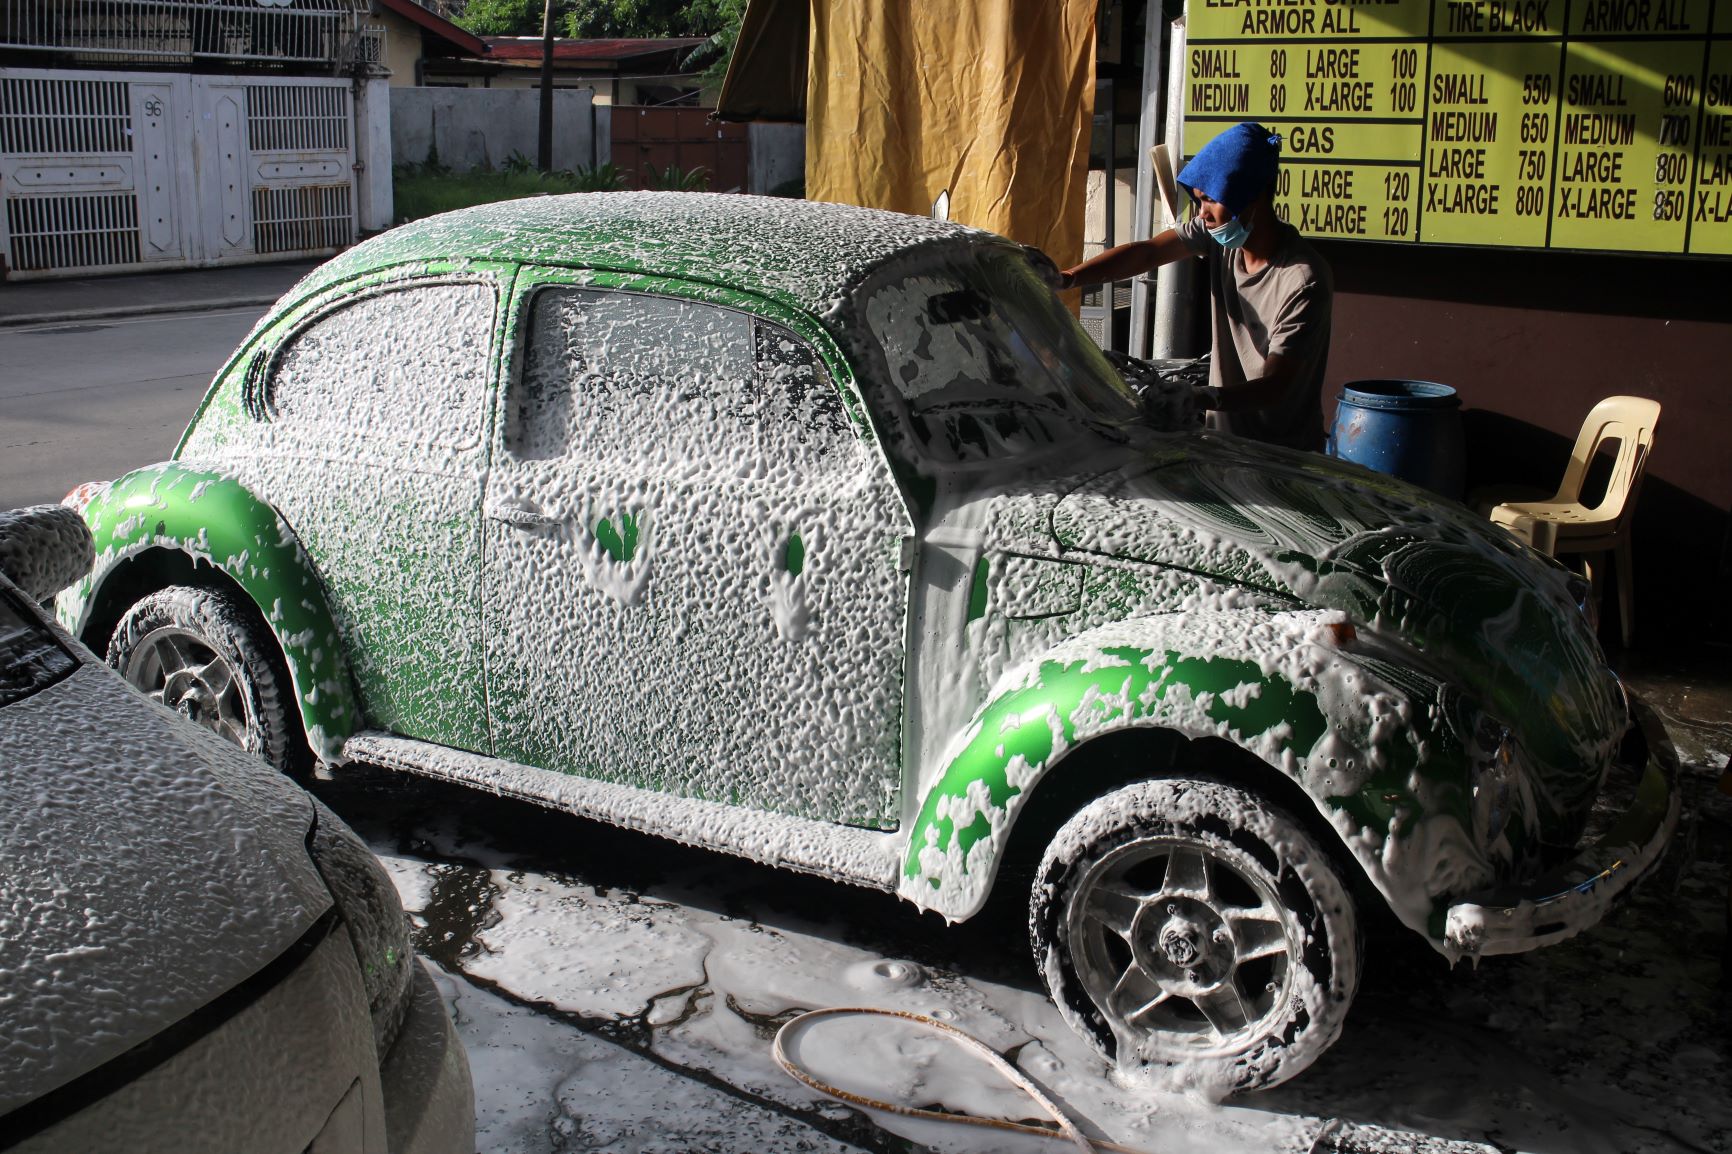
At The Carwash, Yeah!
The carwash boys, who often see me drive in with different cars, mostly brand-new media test drive units, were surprised to see me drive in with the 1974 VW. “Mahilig ka rin pala sa lumang oto, ser. (You also like old cars, sir.)”, blurted one of the boys. One of the customers approached me to say that his family used to have a Beetle and now he’s sorry that they let it go. Meanwhile some small boys, who were passing by, tapped each other on their heads, shouting “Pendong!”, referring to a game where players get a tap on top of their head or forehead when they see a bald guy. To some people, especially the uninitiated, the top of a Beetle looks like a bald head. But it’s all in good fun.
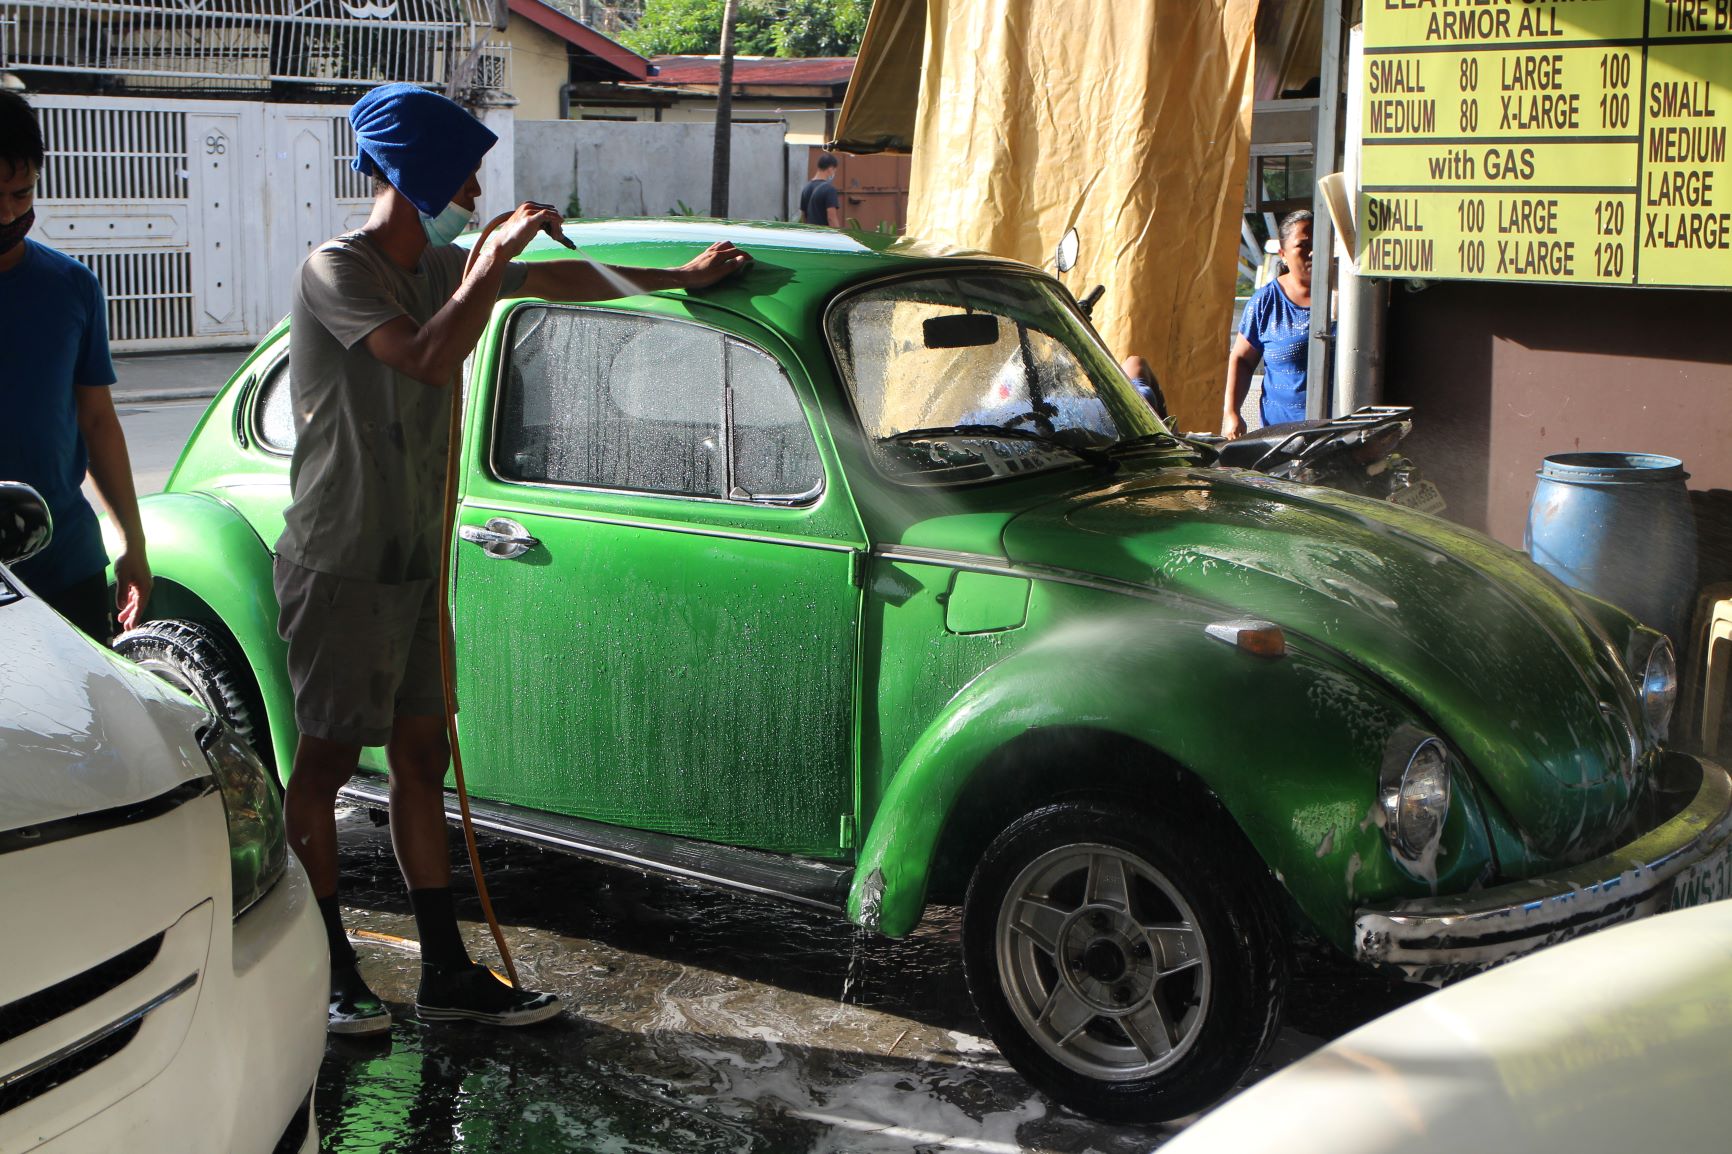
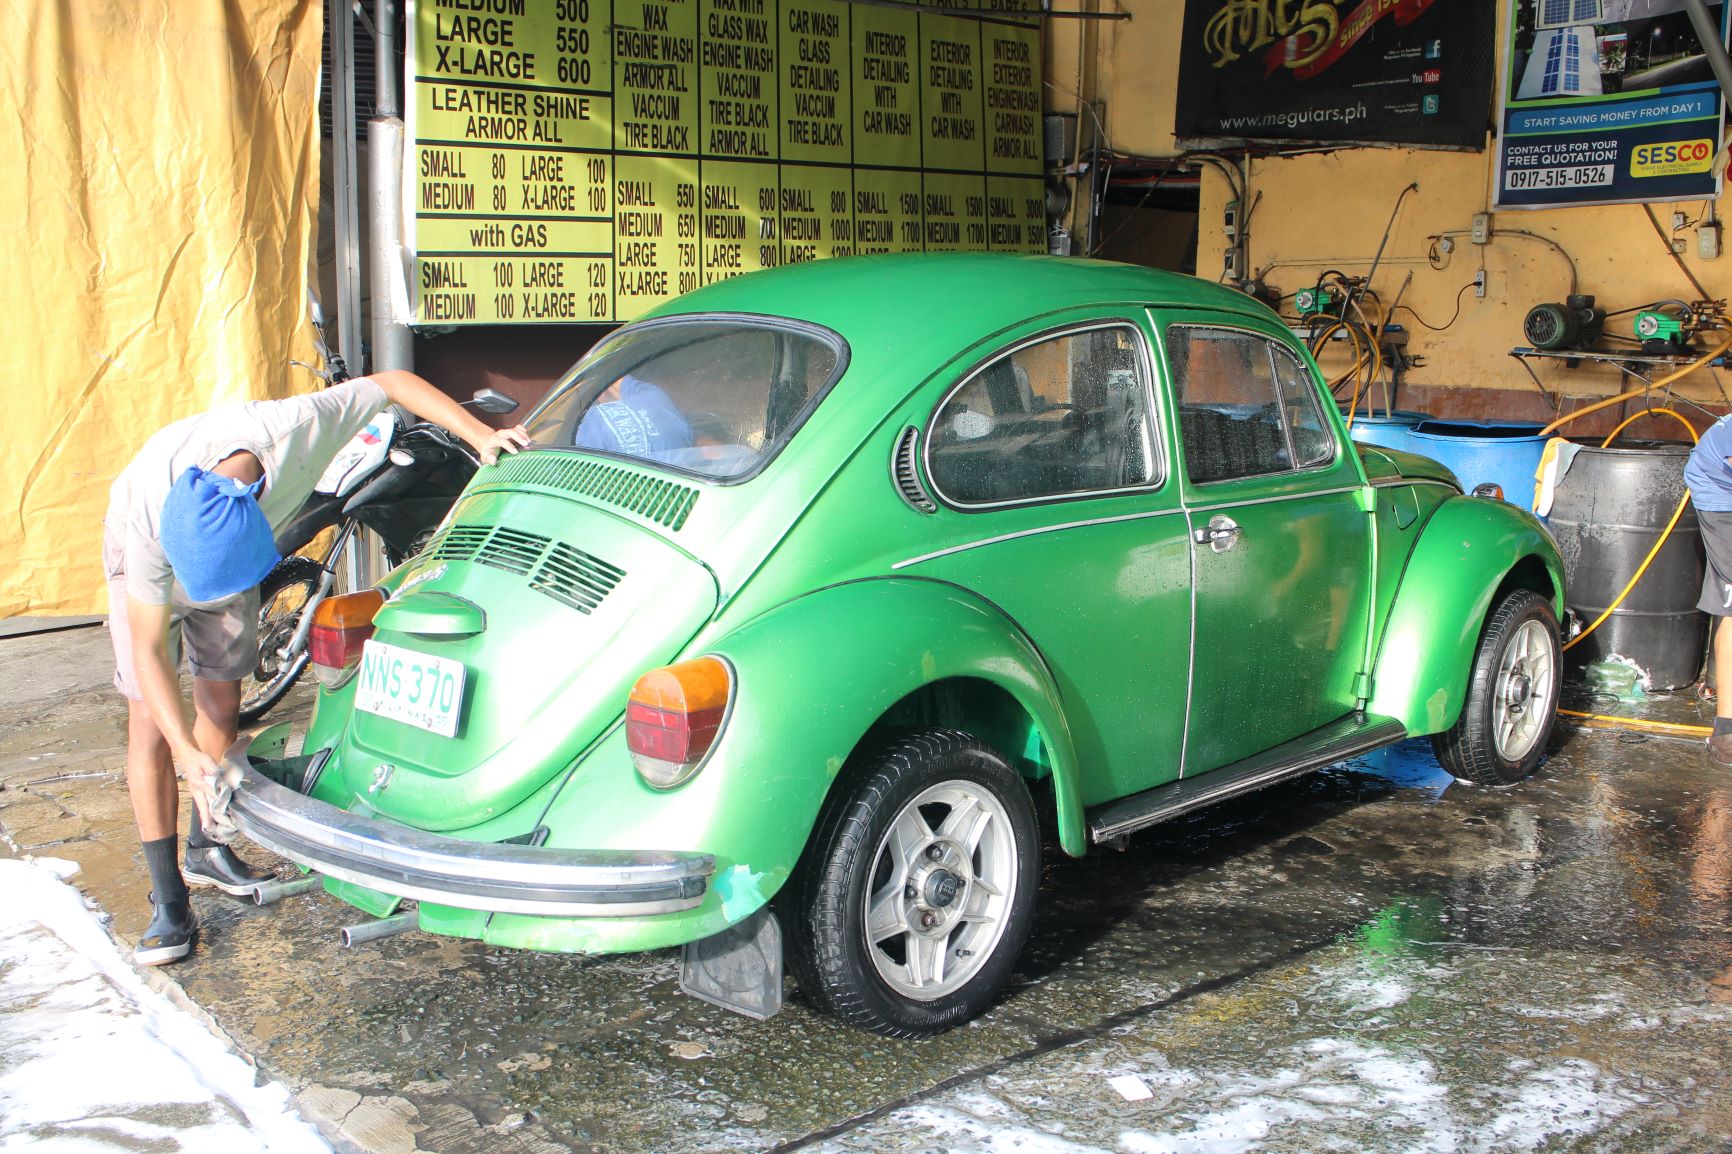

After our project car has been wiped dry, its interior vacuum-cleaned, and tire dressing applied to the four 195/55-15 Bridgestone Potenza tires, I drove off and went around for a while before heading back home. It was a great drive but as I backed the green Bug into our garage, I noticed that the engine idling was becoming erratic. Once inside the garage, the engine suddenly won’t idle but it restarted easily and sounded fine when I step on the gas. I guessed that there was some gunk in the carburetor’s idling circuit because of the long periods of time that this green Bug sat idle in my garage and in the garage of the previous owner. I guess that cleaning the carburetor is what I’ll have to do next time…